Adding an existing cluster
Add an existing DataStax Enterprise cluster to manage using OpsCenter Monitoring. Install agents on the cluster nodes automatically.
Add an existing DataStax Enterprise cluster to manage within OpsCenter. After you add
the cluster to OpsCenter, you can import the
cluster into Lifecycle Manager to centrally manage the cluster topology
and configuration.
Note: If configuration
encryption is active, OpsCenter automatically encrypts the sensitive
fields such as passwords and writes the encrypted values to the configuration
files. Do not enter manually encrypted values in the password fields.
Procedure
-
Click New Cluster from the OpsCenter Monitoring main
menu.
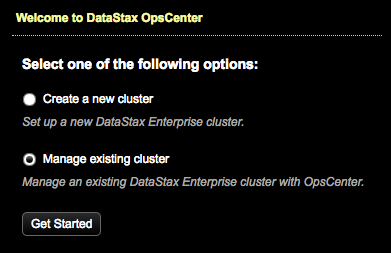
The New Cluster prompt appears.
-
Click Manage Existing Cluster and Get
Started.
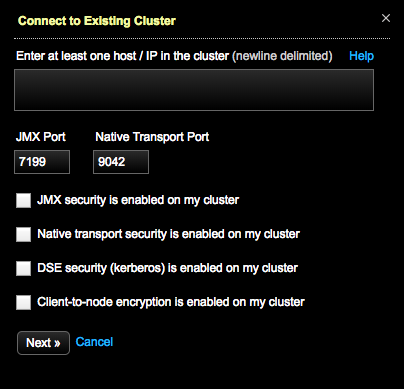
The Connect to Existing Cluster dialog appears.
-
Enter at least one hostname or IP address for a node in the cluster.
ec2-123-45-6-789.us-west-1.compute.amazonaws.com ec2-234-56-7-890.us-west-1.compute.amazonaws.com - Optional: If applicable, change the JMX Port and Native Transport Port listen port numbers if you are not using the defaults.
- Optional: If applicable, click JMX is enabled on my cluster to add or edit user credentials (username and passwords) if the JMX port requires authentication.
- Optional: If applicable, click Native transport security is enabled on my cluster to add or edit user credentials (username and password) if the Native Transport port requires authentication.
- Optional:
If applicable to your environment, select DSE security (kerberos) is
enabled on my cluster and complete the fields.

For more information, see Setting up Kerberos and the Kerberos tutorial.
- Optional:
If configuring client-to-node settings, select
Client-to-node encryption is enabled on my cluster.
Indicate the following paths for OpsCenter and each agent to use for connecting
directly to the monitored DSE cluster.
When client-to-node encryption is enabled for a cluster using Lifecycle Manager, the
ssl_truststoreandssl_truststore_passwordfields are automatically propagated in cluster_name.conf with the corresponding values fromssl_keystoreandssl_keystore_passwordfor both opscenterd and the agent: LCM propagates thessl_keystorevalue intossl_keystoreandssl_truststore; and thessl_keystore_passwordvalue intossl_keystore_passwordandssl_truststore_password.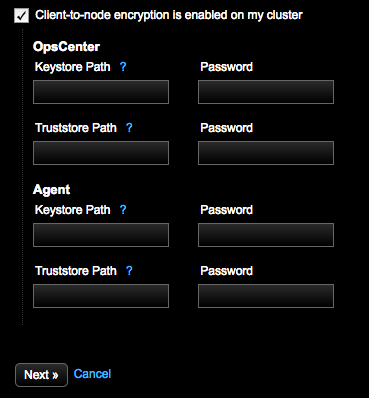 Note: For information about creating keystores and truststores, see Enabling client-to-node encryption in OpsCenter.
-
Enter the OpsCenter Keystore Path, which is the
SSL keystore location for OpsCenter (opscenterd) to use for connecting
to the monitored DSE cluster. The value entered in the UI populates the
[cassandra] ssl_keystoreproperty in the OpsCenter cluster configuration file (cluster_name.conf). -
Enter the Password for the OpsCenter
Keystore Path. The value entered in the UI populates the
[cassandra] ssl_keystore_passwordproperty in cluster_name.conf. -
Enter the OpsCenter Truststore Path, which is
the SSL truststore location for OpsCenter (opscenterd) to use for
connecting to the monitored DSE cluster. This value should be the same
as OpsCenter Keystore Path if the same file is
used as both the keystore and the truststore (that is, there is not a
separate truststore). The value entered in the UI populates the
[cassandra] ssl_truststoreproperty in cluster_name.conf. -
Enter the Password for the OpsCenter
Truststore Path. This value should be the same as
password for the OpsCenter Keystore Path if the
same file is used as both the keystore and the truststore (that is,
there is not a separate truststore). The value entered in the UI
populates the
[cassandra] ssl_truststore_passwordproperty in cluster_name.conf. -
Enter the Agent Keystore Path, which is the SSL
keystore location for each agent to use for connecting to the monitored
DSE cluster. The value entered in the UI populates the
[agents]
                                ssl_keystore
property in cluster_name.conf. -
Enter the Password for the Agent
Keystore Path. The value entered in the UI populates the
[agents] ssl_keystore_passwordproperty in cluster_name.conf. -
Enter the Agent Truststore Path, which is the
SSL truststore location for each agent to use for connecting to the
monitored DSE cluster. This value should be the same as password for the
Agent Keystore Path if the same file is used
as both the keystore and the truststore (that is, there is not a
separate truststore).The value entered in the UI populates the
[agents] ssl_truststoreproperty in (cluster_name.conf). -
Enter the Password for the Agent
Truststore Path. This value should be the same as
password for the Agent Keystore Path if the same
file is used as both the keystore and the truststore (that is, there is
not a separate truststore). The value entered in the UI populates the
[agents] ssl_truststore_passwordproperty in cluster_name.conf.
-
Enter the OpsCenter Keystore Path, which is the
SSL keystore location for OpsCenter (opscenterd) to use for connecting
to the monitored DSE cluster. The value entered in the UI populates the
-
Click Next.
The Set Up Agents dialog appears.
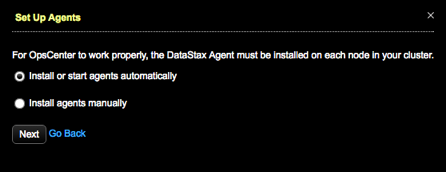
-
Install or start agents automatically is selected by default.
Click Next.
If your environment requires manual installation of agents, click Install agents manually. Click the link to access the instructions for manually installing agents.The Agents Credentials dialog appears.
-
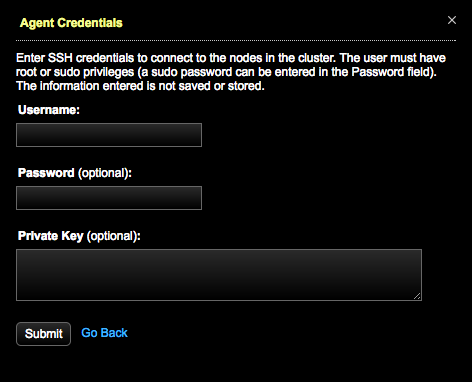
Enter SSH credentials to connect to the nodes:
Important: You must specify either a sudo password for the indicated user, or a private SSH key. The installation will fail without one of these values.
- Enter a Username. The user must have root or sudo privileges.
- Enter a sudo Password for the specified user.
- Enter a Private Key.
Entered credentials information is not saved or stored. -
Click Submit.
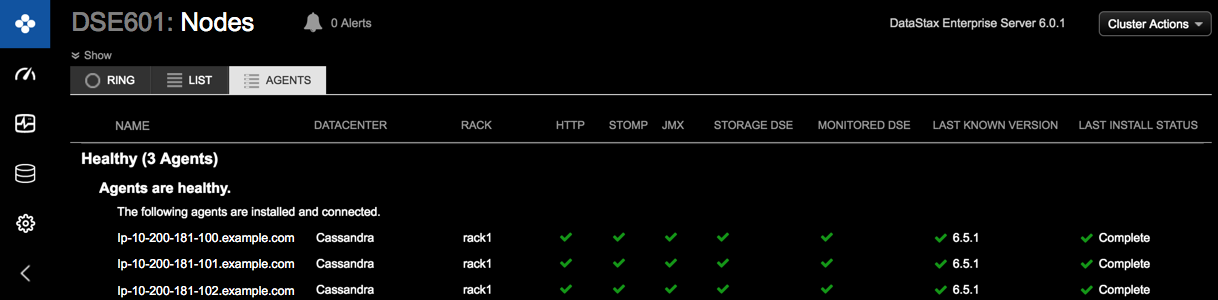
The Agents tab opens, starts installing the agents, and displays the progress of the agent installation. The agent services might go up and down during the installation process.
When the installation process successfully completes, the DataStax agents are deployed and configured for each managed node in the DataStax Enterprise cluster.