Portfolio Manager demo using DSE Hadoop (deprecated)
Steps to run a tutorial for the Hadoop component that is integrated into DataStax Enterprise to create and manage a portfolio of stocks. Hadoop is deprecated for use with DataStax Enterprise. DSE Hadoop and BYOH (Bring Your Own Hadoop) are also deprecated.
Note: Hadoop is deprecated for use with DataStax Enterprise. DSE Hadoop
and BYOH (Bring Your Own Hadoop) are also deprecated.
The use case is a financial
application where users can actively create and manage a portfolio of stocks. On the
Cassandra OLTP (online transaction processing) side, each portfolio contains a list
of stocks, the number of shares purchased, and the purchase price. The demo's pricer
utility simulates real-time stock data where each portfolio updates based on its
overall value and the percentage of gain or loss compared to the purchase price.
This utility also generates 100 days of historical market data (the end-of-day
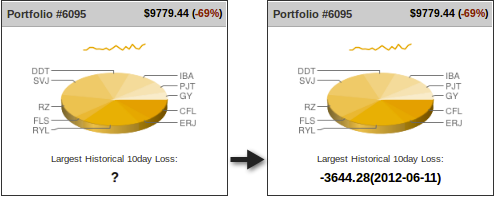
price) for each stock. On the DSE OLAP (online analytical processing) side, a Hive
MapReduce job calculates the greatest historical 10 day loss period for each
portfolio, which is an indicator of the risk associated with a portfolio. This
information is then fed back into the real-time application to allow customers to
better gauge their potential losses.Procedure
To run the demo:
Note: DataStax Demos do not work with either
LDAP or internal authorization (username/password) enabled.
-
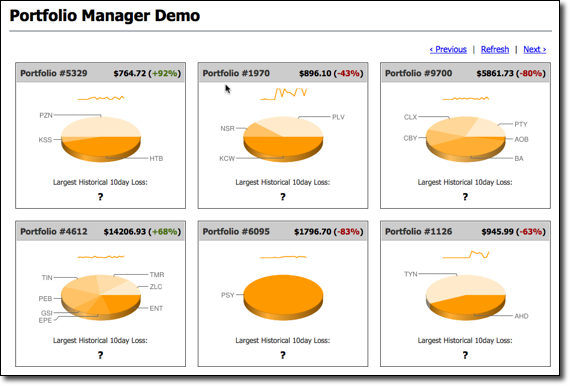
Open a browser and go
to http://localhost:8983/portfolio.
The real-time Portfolio Manager demo application is displayed.
-
After the job completes, refresh the Portfolio Manager web
page.
The results of the Largest Historical 10 day Loss for each portfolio are displayed.