Materialized View wizards
Wizards for generating valid CQL statements that create, edit, or clone a new materialized view in a cluster.
DataStax DevCenter is compatible with DataStax Enterprise (DSE) versions up to 5.0.
The New Materialized View wizards generate valid CQL statements that create, edit, or clone a new materialized view in the specified cluster.
New Materialized View wizard
- Basic Settings
- Primary Key Settings
- Advanced Settings
- Compaction
- Summary
- select the menu item
- right-click in the schema navigator and select New Materialized View
- press the key shortcut ⌥⇧+⌘+V(Mac OS X) or Ctrl+Alt+Shift+V (Linux / Windows)
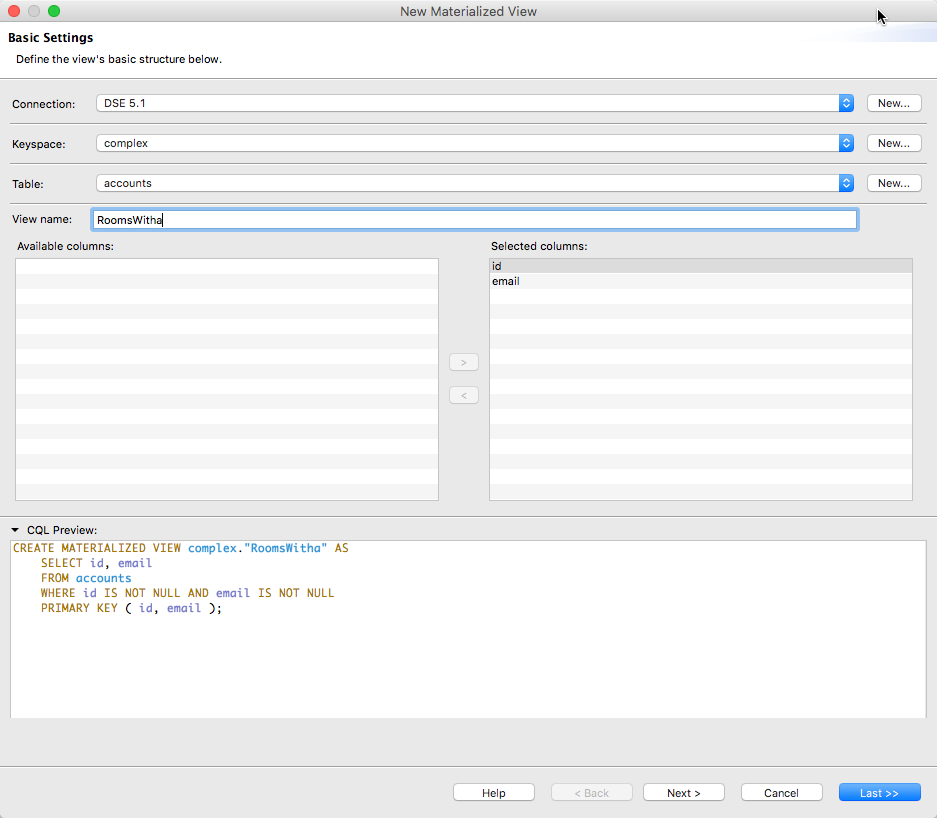
The first panel (Basic Settings) of the New Materialized View wizard displays. There are two panes on this panel: one that displays materialized view settings and allows editing of them, and a CQL Preview pane that displays the CQL statement for creating the materialized view generated from the values in the first pane.
- Connection
- choose an existing connection or create a new one
- Keyspace
- choose an existing keyspace or create a new one
- Table
- choose an existing table or create a new one
- View name
- type a valid materialized view name
- Available columns
- select an available column
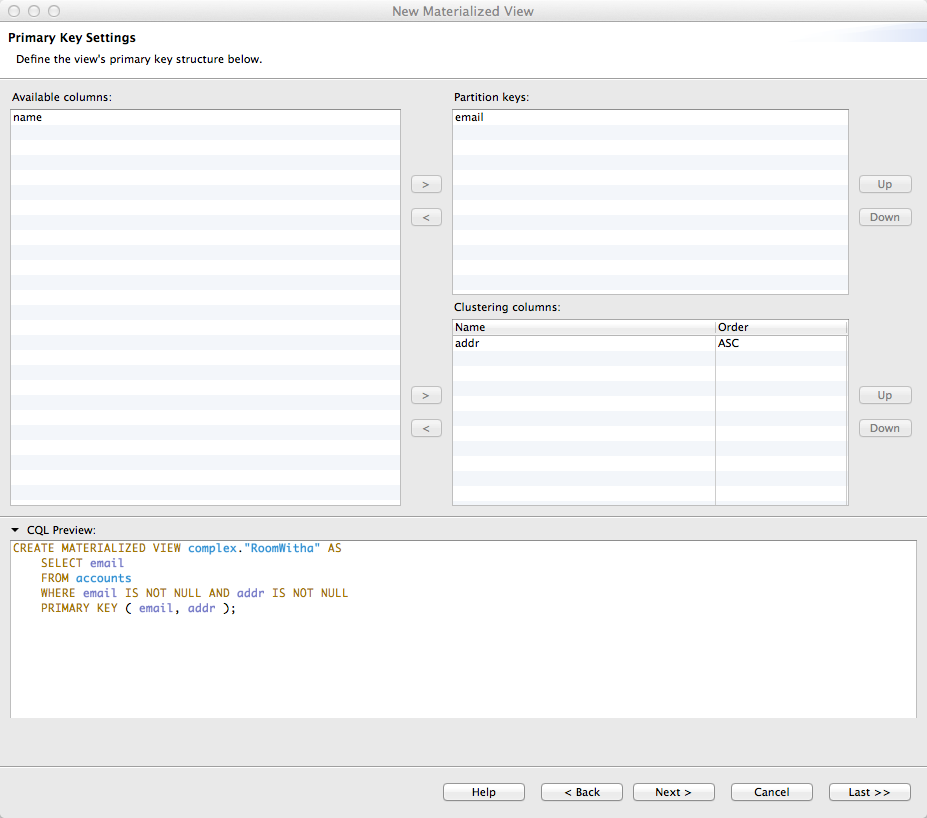
After selecting Next, the second panel (Primary Key Settings) of the New Materialized View wizard displays.
- Available columns
- displays the available columns
- Partition keys
- displays the partition key for the table (which determines the node on which the data is stored)
- Clustering columns
- displays the clustering columns for the table
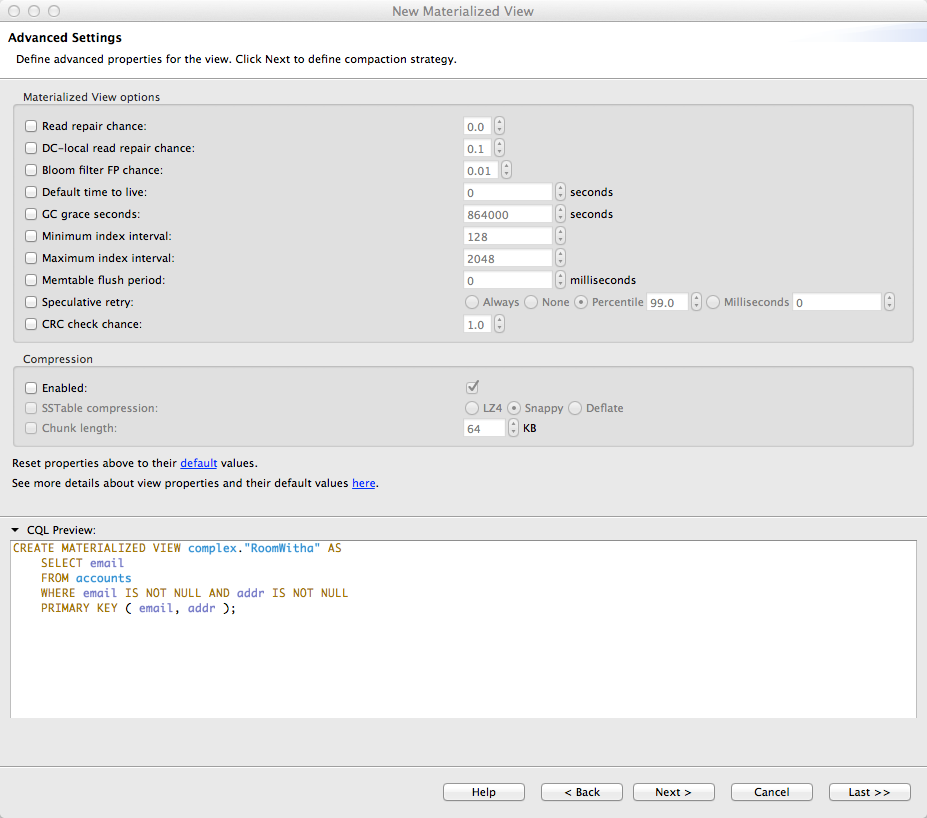
After selecting Next, the final panel (Advanced Settings) of the New Materialized View wizard displays.
- Materialized View options
-
- Read repair chance
- the basis for invoking read repairs on reads in clusters (a value between 0 and 1)
- DC-local read repair chance
- the probability of read repairs being invoked over all replicas in the current data center
- Bloom filter FP chance
- the desired false-positive probability for SSTable Bloom filters
- Default time to live
- the default expiration time in seconds for a table. Used in MapReduce scenarios when you have no control of TTL
- GC grace seconds
- specifies the time to wait before garbage collecting tombstones (deletion markers). The default value allows a great deal of time for consistency to be achieved prior to deletion. In many deployments this interval can be reduced, and in a single-node cluster it can be safely set to zero.
- Minimum index interval
- The minimum value to control the sampling of entries from the partition index, configure the sample frequency of the partition summary by changing these properties
- Maximum index interval
- The maximum value to control the sampling of entries from the partition index, configure the sample frequency of the partition summary by changing these properties
- Index interval
- (Apache Cassandra™ 2.0 only): The interval value to control the sampling of entries from the partition index
- Memtable flush period
- Forces flushing of the memtable after the specified time in milliseconds elapses
- Speculative retry
- overrides normal read timeout when read_repair_chance is not 1.0, sending another request to read
- CRC check chance
- the probability with which checksums are checked during read
- Compression
-
- Enabled
- whether compression is enabled or not
- SSTable compression
- the compression to use (LZ4, Snappy, Default, or None)
- Chunk length
- size of block used by compression scheme
- Reset properties above to their default values
- See more details above table properties and their default here
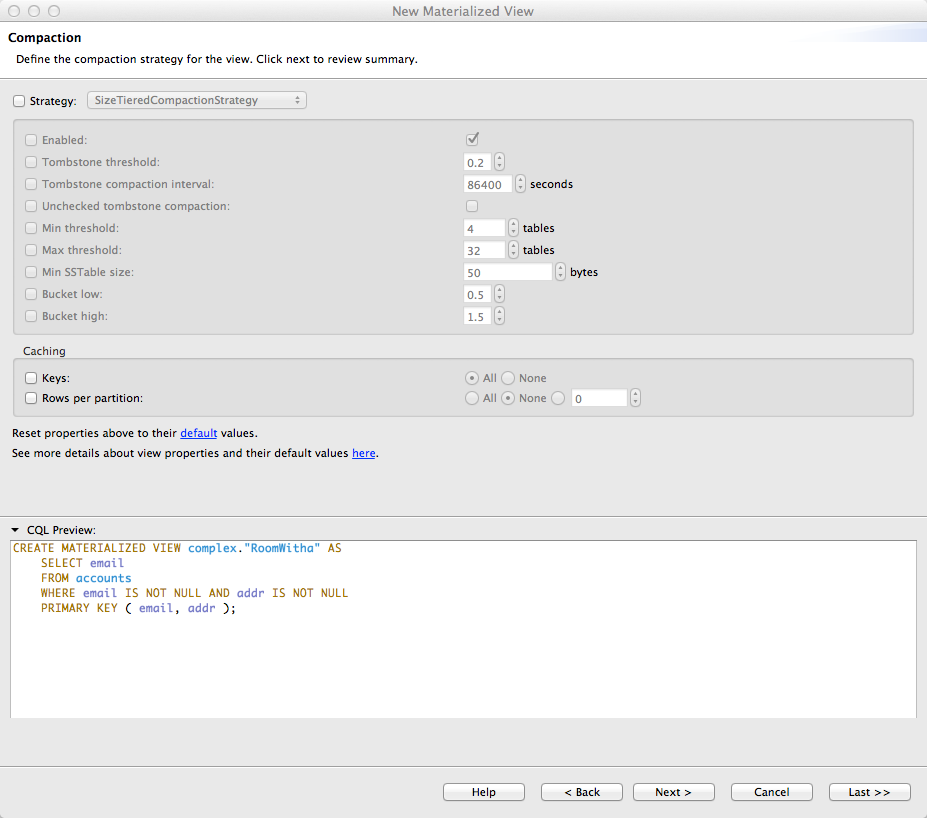
After selecting Next, the Compaction panel of the New Materialized View wizard displays.
- Strategy
- sets the compaction strategy class to use
- Enabled
- Tombstone threshold
- Tombstone compaction interval
- Unchecked tombstone compaction
- Min threshold
- Max threshold
- Min SSTable size
- Bucket low
- Bucket high
- Caching (Apache Cassandra 2.1 and higher)
-
- Keys
- ALL or NONE
- Rows per partition
- number of CQL rows, NONE, or ALL
- Caching (Apache Cassandra 1.2 and 2.0)
-
- Keys
- ALL, KEYS_ONLY, ROWS_ONLY, or NONE
- Reset properties above to their default values.
- See more details above table properties and their default here
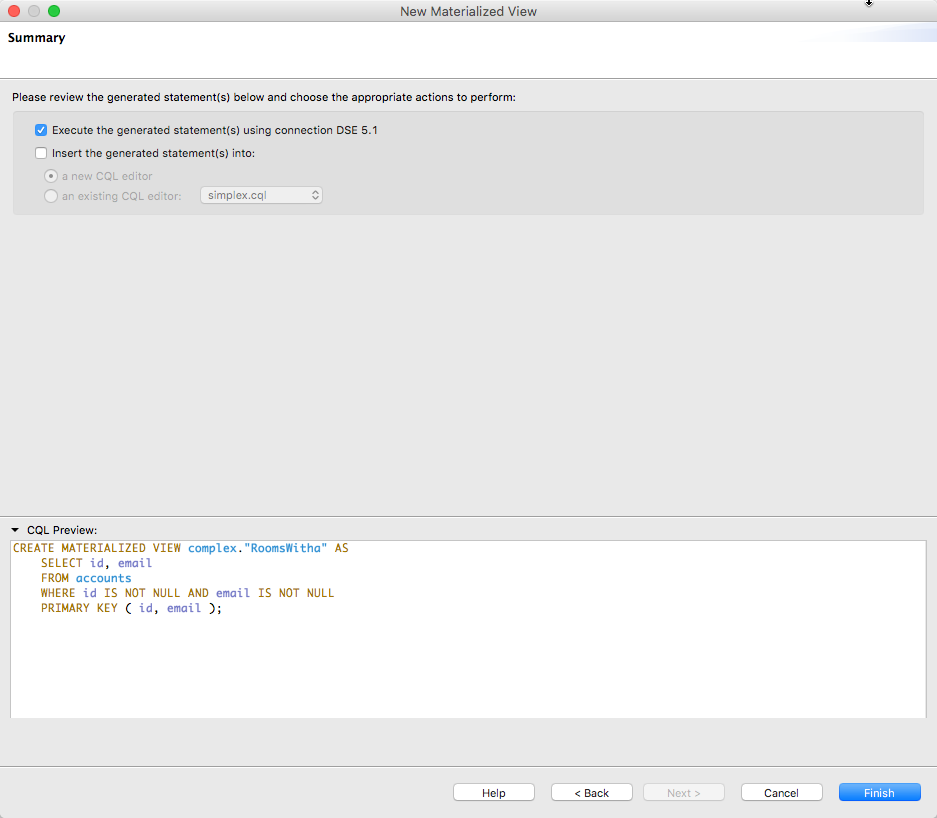
After selecting Next, the final Summary panel of the New Materialized View wizard displays.
- Execute the generated statement(s) using connection Apache Cassandra 3.0
- Insert the generated statements into:
- a new CQL editor
- an existing CQL editor
Edit View wizard
The Edit View and Clone View wizards have fewer steps because some of the details of an already defined materialized view cannot be changed. You access the Edit View and Clone View wizards by right-clicking on an existing materialized view node in the Schema Navigator and selecting the respective menu item in the contextual menu.
The Edit View wizard starts out with the Advanced Settings and includes the Compaction and Summary panels because you cannot edit the values on the Basic Settings and Primary Key Settings panels.
On the other hand, the Clone View wizard does start with the Basic Settings panel and loads the constituent data from the cloned view into its panels.