Creating a simple notebook in DataStax Studio
A notebook requires a name and a connection to a DSE cluster.
Procedure
-
Open the Studio server by entering
http:/URI_running_DSE:9091/in your web browser.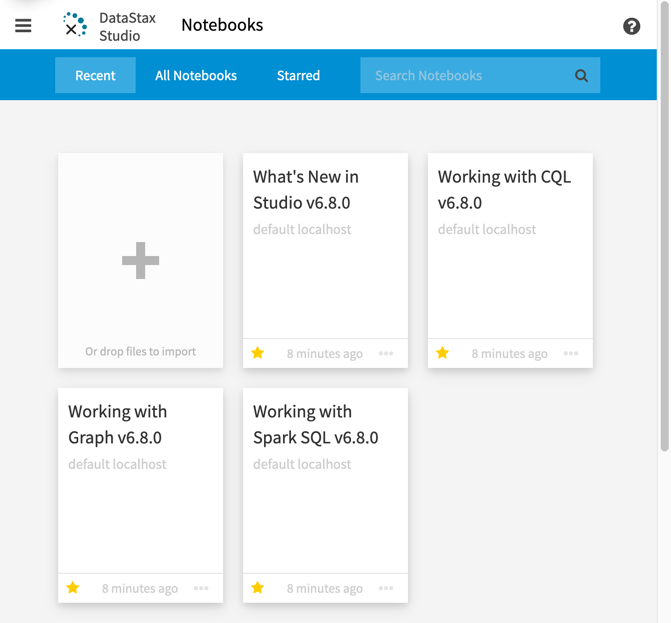
DataStax Studio opens to the Notebooks page.
-
Click the plus (+) to add a notebook.
The Create Notebook dialog displays.
-
Enter the notebook name.
-
Select an existing connection or click + Add New Connection.
The connection auto-fills if there is only a single connection.
-
For a new connection, enter the connection information:
- Name
-
Name of the connection from the notebook to a DSE cluster.
- Host/IP (comma delimited)
-
The host names or IP addresses of the DSE cluster to connect to. All hosts must be in a single datacenter. Default: localhost.
- Username
-
Optional: DSE username for logging in.
- Password
-
Optional: DSE password for logging in.
- Port
-
IP connection port. Default: 9042.
- For example, to connect to a single-node DSE cluster on the local host using the default port:
- Name
-
My First Connection
- Host/IP
-
127.0.0.1 - Port
-
9091
-
Click Test to verify the connection works.
-
Optional: To configure a secure encrypted connection, select the Use SSL check box.
The Truststore and Keystore fields display. See Using SSL connections in DataStax Studio.
-
Click Save.
A connection is created from the notebook to the DSE cluster.
-
Select Create.
The notebook displays with a single empty (default) cell in CQL edit mode. This can be changed to Gremlin, SparkSQL, or Markdown.
-
The following steps show a Markdown example:
-
In the default cell, change the drop-down to Markdown.
-
Add some verbiage to the default cell:
My Notebook ----------- Schema-aware content-assist improves productivity. Studio inspects your schema to make smart suggestions based on your data model. When you work with properties of a person, then you'll see suggestions for name and date_of_birth. -
Select Run Cell to render the marked down text.

-
Create another Markdown cell.
