Backup and Restore fields reference
Reference of fields that are UI controls in the Backup Service dialogs. The fields appear in both Backup and Restore dialogs.
Backup and Restore fields descriptions
Reference of fields that are UI controls in the Backup Service. The fields can appear in both Backup and Restore dialogs. The fields that appear in a given dialog depend on the type of task you are performing with the Backup Service, and other factors such as cluster topology (datacenters, for instance).
Backup fields
| Create (or Edit) Scheduled Backup dialog | Create (or Edit) Backup Run Now dialog |
|---|---|
|
|
|
| Field | Description |
|---|---|
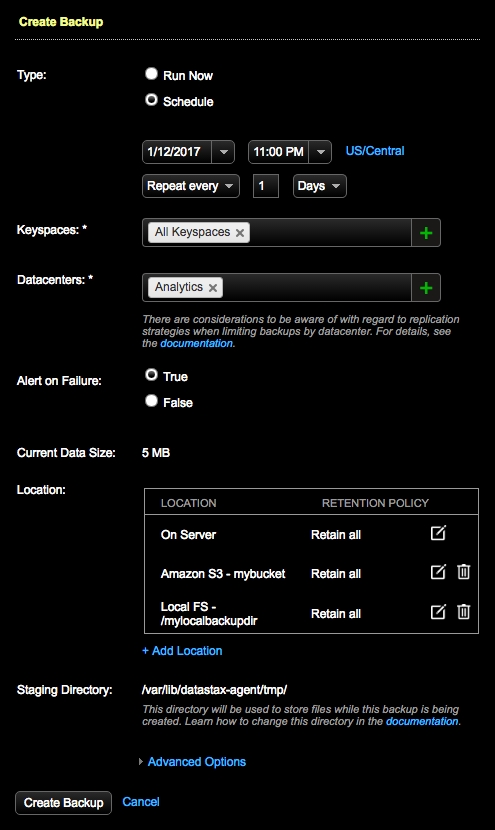
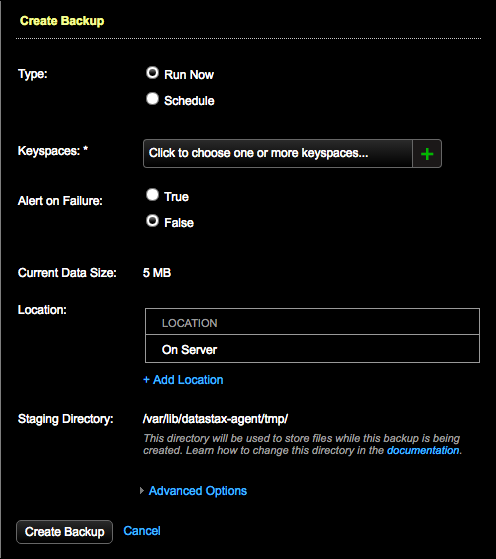
| Type | Type of backup job to create: Run now or Scheduled. |
| Schedule | Schedule backup settings by date and time. Only appears when
Schedule is selected as the Type. Available settings:
|
| Keyspaces | Required. Allows selecting one or more or all keyspaces for a backup. When backing up a DSE Graph database, select your graph keyspace. When a keyspace is created in DSE Graph, it is actually comprised of three keyspaces that OpsCenter bundles together because all three keyspaces are required for a DSE Graph backup. Tip: Click the plus (+) icon to
select one or more options. To keep the list open when making multiple selections,
press and hold the Cmd key (Mac) or Ctrl key (Windows/Linux). |
| Datacenters | Required. The Datacenters field only appears if there are multiple datacenters
configured for a cluster. Allows selecting one or more or all datacenters for a
backup. Running a backup by a specific datacenter improves backup performance under
most circumstances, because the process eliminates backing up data redundantly since
the data is replicated to other datacenters anyway. Warning: When limiting a backup by datacenter, if the SimpleStrategy
replication strategy is used, or the NetworkTopologyStrategy is used with a
replication factor of 0 for a datacenter, the snapshot might not contain all the
data for the cluster. Tip: Click the plus (+) icon to
select one or more options. To keep the list open when making multiple selections,
press and hold the Cmd key (Mac) or Ctrl key (Windows/Linux). |
| Alert on Failure | Activates an alert upon backup failure that sends an alert to the event log.
Default: False. Tip: Enabling Alert on Failure
is particularly useful for monitoring scheduled overnight backups. Configure alerts for events and
route the alerts through email, or post
URLs to a chat room such as HipChat or Slack. |
| Current Data Size | Current data size is a best estimate of how large the snapshot will be based on the currently selected keyspace or keyspaces. The information is based on table metrics collected by OpsCenter. Current Data Size is a dynamic read-only field that displays Unknown when size information is not available for the selected keyspaces. An Unknown Data Size typically displays when either a system keyspace is selected or keyspace size information has not been collected yet. |
| Location | Snapshots are saved to the node's snapshot directory for the table being saved. For example, /var/lib/cassandra/data/OpsCenter/settings/snapshots. Add more locations to back up to and restore from, including Local file system and Amazon S3 locations, by clicking Add Location. Set a retention policy for the backup data in each location of a backup job. See Adding a backup location. |
| Staging Directory | The location of the Backup Service staging directory for backups. The default location is /var/lib/datastax-agent/tmp. To change the default location of the directory, indicate the path using the tmp_dir configuration option in address.yaml. |
| Advanced Options | Expands the Pre-Backup Script and Post-Backup
Script fields for running scripts before or after (or both) snapshots
are taken. The script must be located in the appropriate install directory on each
node. Custom backup scripts must be located in:
For details, see Configuring custom scripts to run before and after backups. |
| Create Backup | Creates a scheduled or runs an ad hoc backup job immediately depending on the selected backup Type (Scheduled or Run Now). |
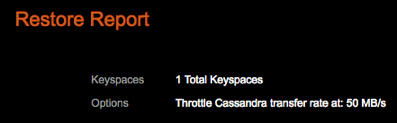
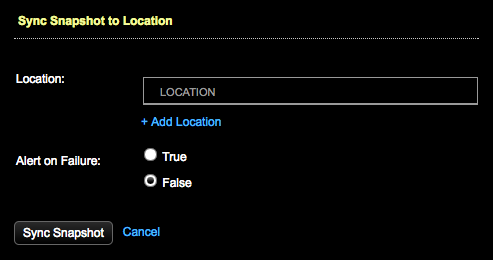
Sync Snapshot to Location dialog
The Sync Snapshot to Location dialog is accessible by clicking Sync to Location from the Backup Report dialog.
| Field | Description |
|---|---|
| Location | Displays the locations configured by clicking the +Add Location link. |
| Activates an alert if the sync snapshot operation fails. | |
| Sync Snapshot | Syncs a snapshot to the designated location. |
Add Location fields
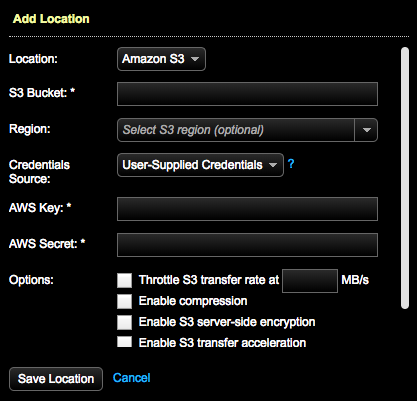
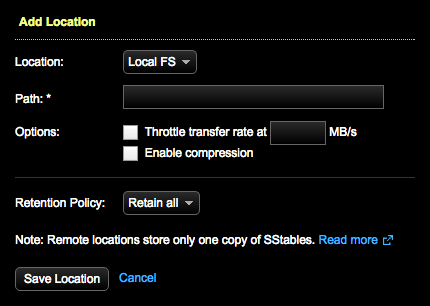
| Add (or Edit) Location Amazon S3 dialog | Add (or Edit) Location Local FS dialog |
|---|---|
|
|
|
| Field | Description |
|---|---|
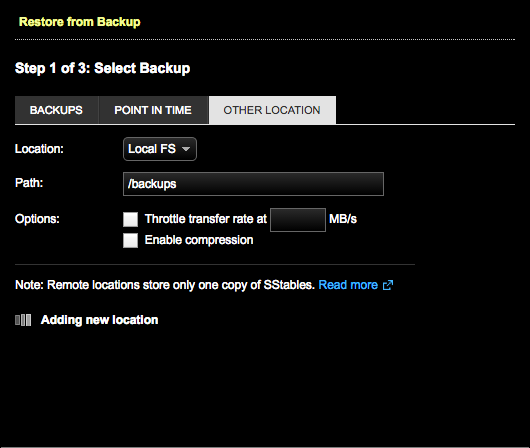
| Location | Specifies the location to backup data to and restore data from. Available options:
|
| Path | Only applicable to the Local FS location. The path to a local file system location such as an NFS mount. The path must be unique and can include subdirectories. Required. |
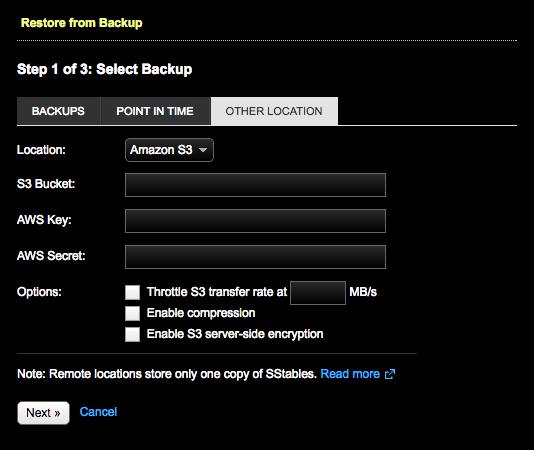
| S3 bucket | Only applicable to an Amazon S3 location. The Amazon S3 bucket name. The bucket
name must be unique. Note: The bucket name must be at least 4 characters long. Bucket
names should only contain lowercase letters, numbers, and hyphens. See the S3 guidelines for more details about
bucket naming restrictions. Tip: To indicate a bucket subfolder location, delineate the bucket name from the
folder name with a forward slash (/) character. Example:
mybucket/myfolder/mysubfolder. Remember that slashes are
not allowed within bucket or folder names themselves. Required. |
| AWS Key | Only applicable to an Amazon S3 location. Your AWS Key to access your resources on AWS. Required. |
| AWS Secret | Only applicable to an Amazon S3 location. Your AWS Secret to access your resources on AWS. Required. |
| Throttle S3 transfer rate | Only applicable to an Amazon S3 location. Sets a maximum upload rate at the
specified MB/s to avoid saturating your network. Optional. Note: When the AWS CLI labs feature is enabled, the S3
throttle is ignored at this time. A tooltip also mentions this current limitation.
See Tuning throttling when using AWS CLI. |
| Throttle transfer rate | Only applicable to a Local FS location. Sets a maximum upload rate at the specified MB/s to avoid saturating your network. Optional. |
| Enable compression | Decompresses a backup that was created with compression enabled. Compression reduces the amount of data going through the network and reduces the disk and data usage but increases the CPU load for the server. Optional. |
| Enable S3 server-side encryption | Only applicable to an Amazon S3 location. Enables server-side S3 encryption (SSE-S3). Server-side encryption encrypts each file in the backup set with a unique key, as well as the key itself, using a 256-bit AES cypher. The key is encrypted with a master key that is regularly rotated. Enabling server-side encryption increases the security of your backup files, but increases the time it takes to complete a backup. For more information on S3 server-side encryption, see https://docs.aws.amazon.com/AmazonS3/latest/dev/UsingServerSideEncryption.html. Optional. |
| Retention Policy | Retention
Policy is only available for scheduled backups. Available options:
|
| Save Location | Saves the location for backup and restores. |
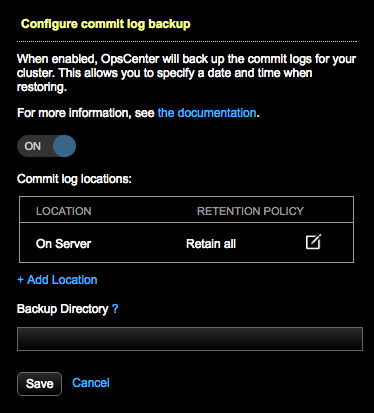
Configure commit log backup dialog for point in time restore
| Field | Description |
|---|---|
| On | Toggles commit log backups On or Off. Configure commit log backups to facilitate point in time restores. |
| Commit log locations | Configured locations for commit log backups. Clicking +Add Location opens the Add Location dialog to configure additional locations beyond On Server, such as Amazon S3 or Local FS. |
| Backup Directory | The path to the location where commit logs are stored on each node. The
directory must be writable both by the user running DataStax Enterprise and the
agent user, which are by default the same user. Note: The Backup
Directory and the tmp_dir must located on
the same filesystem so that a hard link can be established between
them. |
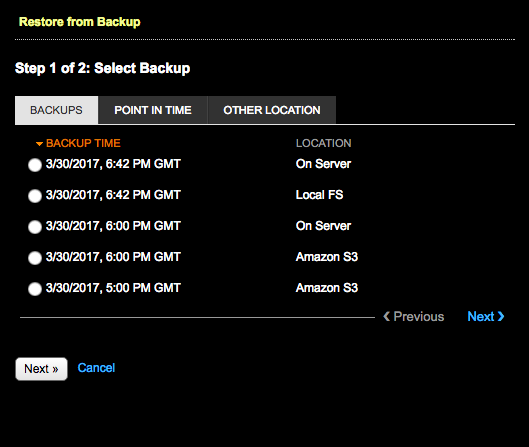
Restore from backup dialogs fields
The Restore process steps through two or more dialogs depending on the selections and type of restore or clone. Depending on the selected backup location, the dialog title is Step 2 or 3 of 3. Selecting Other Location is a 3-step process. Follow the task procedures for step-by-step instructions.
| Field | Description |
|---|---|
| Backups tab
|
|
| Backup Time | List of available backups by date, time, and location to select for a restore. |
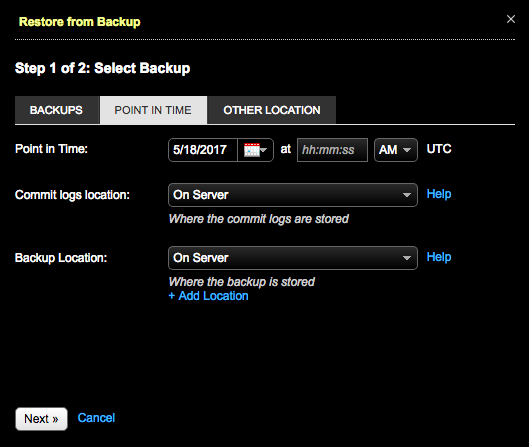
| PIT Restore tab
|
|
| Point in Time | Sets the date and time to restore data. |
| Commit logs Location | Selects the location of the commit logs; either On Server, Local FS, or another location on Amazon S3. The location of commit logs is configured when enabling commit log backups. |
| Backup Location | Selects the location of the snapshot. Available locations: On Server, Local FS path, Amazon S3 bucket. The +Add location link is available to add more locations. |
| Other Location tab The Other Location tab allows specifying the same fields as available in the Add Location dialogs. |
|
|
|
|
|
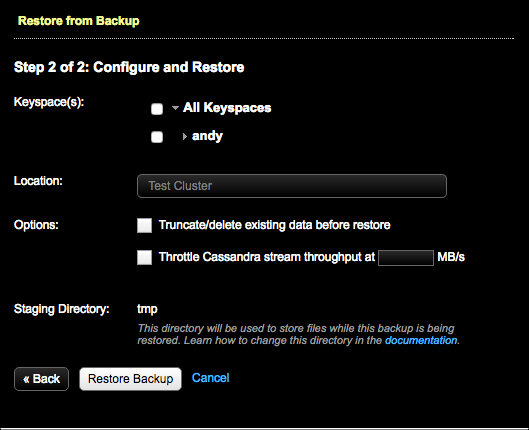
Configure and Restore dialogs Depending on the selected backup location, the dialog title is Step 2 or 3 of 3. Selecting Other Location is a 3-step process. |
|
 |
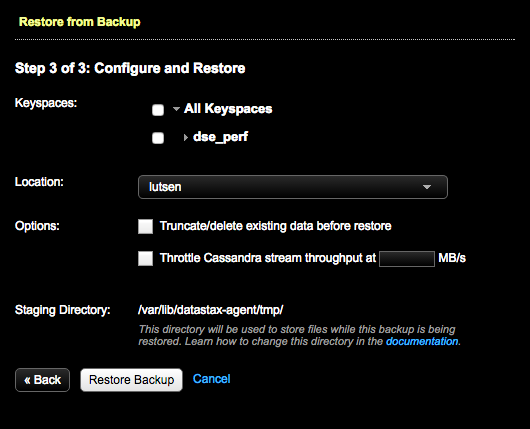 |
| Keyspaces | Required. Allows selecting one or more or all keyspaces for a restore. When restoring a DSE Graph database, select your graph keyspace. When a keyspace is created in DSE Graph, it is actually comprised of three keyspaces that OpsCenter bundles together because all three keyspaces are required for a DSE Graph backup. Tip: Click the plus (+) icon to
select one or more options. To keep the list open when making multiple selections,
press and hold the Cmd key (Mac) or Ctrl key (Windows/Linux). |
| (Cluster) Location | The location of the cluster to which to restore or clone data. Only clusters managed by a singular OpsCenter instance appear in this list. |
| Truncate/delete existing data before restore | Removes the existing keyspace data before the data is restored or cloned. |
| Throttle stream throughput | Sets a maximum transfer rate at the specified MB per second for the restore.
Throttling prevents overloading the network. Recommended. When a throttle value is
not set, the following warning displays in the Confirm Restore dialog for versions
of DSE from 4.8.7 and later: An outgoing stream throttle value was not specified
for this restore. If cassandra.yaml does not have values set
for
|
| Staging Directory | The location of the Backup Service staging directory for backups and restores. The default location is /var/lib/datastax-agent/tmp. To change the default location of the directory, indicate the path using the tmp_dir configuration option in address.yaml. |
| Restore Backup | Begins a restore backup job immediately. |
| Start Restore | Confirms the restore operation from the Confirm Restore dialog. |