Build a chatbot with LangChain
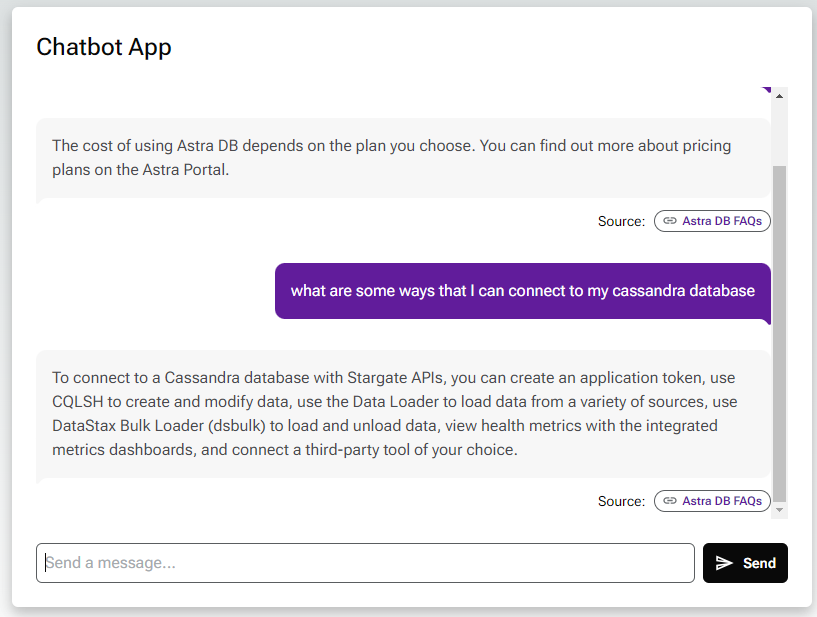
In this tutorial, you will build a chatbot that can communicate with the FAQs from DataStax’s website. You will generate embeddings with LangChain and OpenAI, which the chatbot will use to find relevant content.
You’ll also create a simple React.js chatbot frontend that works with FastAPI and Vercel’s serverless functions to connect your frontend to Astra DB and the OpenAI Completions API.


Prerequisites
This tutorial requires the following:
-
An active Astra account
-
A paid OpenAI account
-
Python 3.7 or later
-
Node.js 18 or later
-
Familiarity with running Python scripts and using Vercel
Clone the Git repository
Clone the chatbot Git repository and switch to that directory.
git clone https://github.com/datastax/astra-db-chatbot-starter.git
cd astra-db-chatbot-starter
Create a database and set environment variables
This tutorial uses a Serverless (vector) database to store the tutorial app data and embeddings. If you’re new to vector databases, see What are vector databases?.
-
Create a Serverless (vector) database, or use an existing one.
-
In the Astra Portal, click the name of the database that you want to connect to.
-
Under Database details, click Generate token to create an application token for the database, and then set it as the
APPLICATION_TOKENenvironment variable.export APPLICATION_TOKEN=APPLICATION_TOKEN -
Copy the database’s API Endpoint, and then set it as the
API_ENDPOINTenvironment variable:export API_ENDPOINT=API_ENDPOINT -
Set the
KEYSPACE_NAMEenvironment variable to a keyspace that you want to use for this tutorial. The default keyspace for Serverless (vector) databases isdefault_keyspace.export KEYSPACE_NAME=default_keyspace # A keyspace that exists in your database -
Set the
COLLECTION_NAMEenvironment variable to the name of a collection that you want to create and use for this tutorial:export COLLECTION_NAME=COLLECTION_NAME # Your database collection -
In the OpenAI Platform, create an API key, and then set it as the
OPENAI_API_KEYenvironment variable:export OPENAI_API_KEY=API_KEY -
Set
DIMENSIONSto the number of vector dimensions for your model. This tutorial uses the OpenAItext-embedding-ada-002model, which produces vectors with 1536 dimensions.export VECTOR_DIMENSION=1536 -
Set
SCRAPED_FILEto the location where you want to store your scraped data:export SCRAPED_FILE=scrape/scraped_results.json
You have now set the following environment variables:
export APPLICATION_TOKEN=APPLICATION_TOKEN
export KEYSPACE_NAME=default_keyspace # A keyspace that exists in your database
export COLLECTION_NAME=COLLECTION_NAME # Your database collection
export VECTOR_DIMENSION=1536
export SCRAPED_FILE=scrape/scraped_results.json
Set up the code
-
Verify that pip is version 23.0 or later:
pip --versionUpgrade pip if needed:
python -m pip install --upgrade pip -
Install Python dependencies:
npm install pip install -r requirements.txt -
Create a collection in your Astra DB database:
python populate_db/create_collection.py -
Run the
load_data.pyscript to load the scraped website data fromscraped_results.json:python populate_db/load_data.pyIf you encounter an OpenAI rate limit error, see the OpenAI rate limits documentation.
For more about the embeddings, see About the tutorial.
Deploy your chatbot locally
-
Start the backend server (API), which you installed as part of the requirements.
uvicorn api.index:app --reload -
Because the backend server continues to run in the terminal, open a second terminal.
-
In the new terminal, start the web server, which you installed as part of the requirements.
npm run dev -
Because the web server continues to run in the terminal, open a second terminal and export your environment variables again.
-
Test your API by sending it a request:
curl -X POST localhost:8000/api/chat \
--header "Content-Type: application/json" \
--data '{ "prompt": "Can encryptions keys be exchanged for a particular table?" }'
The response is a JSON object (reformatted and shortened here for readability):
Result{ "text": "\nNo, encryptions keys cannot be exchanged for a particular...", "url": "https://docs.datastax.com/en/dse68-security/docs/secFAQ.html" } -
Open http://localhost:3000 to view and test the chatbot in your browser.
Deploy your chatbot with Vercel
To see the chatbot in action, you can deploy it to a serverless environment, such as Vercel.
-
In the Vercel Dashboard, search for and import the third-party Git repo from https://github.com/datastax/astra-db-chatbot-starter.
-
Select the Next.js Framework Preset option.
-
Set the Environment Variables.
-
Click Deploy.
-
Wait a few minutes for your chatbot to deploy.
After you deploy in Vercel the first time, auto-deployment will trigger for each subsequent commit.
For more about using Vercel, see the Vercel documentation.
About the tutorial
Embeddings
We define our embedding model to match the one used in the vectorization step. We use LangChain’s OpenAI library to create a connection to their API for completions as well as embeddings.
The load_data.py script loads the scraped website data that lives in scraped_results.json with the following structure:
{
  [
    {
      "url": url_of_webpage_scraped_1,
      "title": title_of_webpage_scraped_1,
      "content": content_of_webpage_scraped_1
    },
    ...
  ]
}
To learn more about how this data is scraped, you can find the scraper and instructions in the README.
This is a portion of text scraped from a FAQ page about a Premium Support offering:
input_json = {
    "url": ".../services/support/premium-support/faq",
    "title": "FAQ | Premium Support",
    "content": (
        "What is Premium Support?\n"
        "Premium Support consists of three add-on offerings available to enhance your existing support experience\n"
        "There are three Premium offerings currently available:\n"
        "Premium Cloud Engineer\n"
        "Named Engineer\n"
        "Technical Account Manager\n"
        "Can I purchase a Premium Support subscription for any product? \n"
        "You can purchase Premium Support as an add-on to products that are generally available. Please contact PremiumSupport@example.com if you have any questions.\n"
        "What is included in each of the different technical support offerings?"
        # ...
    )
}
The text in input_json['content'] is split on the newline character.
The lines that are questions are stored in question_lines.
all_lines = [
    0["What is Premium Support?"]
    1["Premium Support consists of three add-on offerings available to enhance your existing support experience"]
    2["There are three Premium offerings currently available:"]
    3["Premium Cloud Engineer"]
    4["Named Engineer"]
    5["Technical Account Manager"]
    6["Can I purchase a Premium Support subscription for any product?"]
    7["You can purchase Premium Support as an add-on to products that are generally available. Please contact PremiumSupport@example.com if you have any questions."]
    8["What is included in each of the different technical support offerings?"]
    # ...
]

question_lines = [0, 6, 8] # ...
There are questions on lines 0, 6, 8 … This means that the answers will be on lines 1 to 5, 7 …
Now the answer lines are joined into a list and the output data structure is defined:
q_and_a_output_data = {
    "url": ".../services/support/premium-support/faq"
    "title": "FAQ | Premium Support"
    "questions": [
        ["What is Premium Support?"],
        ["Can I purchase a Premium Support subscription for any product?"],
        # ...
    ]
    "answers": [
        [(
            "Premium Support consists of three add-on offerings available to enhance your existing support experience\n"
            "There are three Premium offerings currently available:\n"
            "Premium Cloud Engineer\n"
            "Named Engineer\n"
            "Technical Account Manager"
        )],
        [(
            "You can purchase Premium Support as an add-on to products that are generally available. "
            "Please contact PremiumSupport@example.com if you have any questions."
        )]
        # ...
    ]
}
Once the text is split into answers and questions, each question and answer pair is iterated. The concatenated text of each question and answer is embedded with an OpenAI embedding model.
The first iteration through the question and answer data gives the following result:
question_id = 1
document_id = ".../services/support/premium-support/faq"
question    = "What is Premium Support?"
answer      = (
    "Premium Support consists of three add-on offerings available to enhance your existing support experience\n"
    "There are three Premium offerings currently available:\n"
    "Premium Cloud Engineer\n"
    "Named Engineer\n"
    "Technical Account Manager"
)
The embeddings are computed in chunks, which reduces the overhead cost of requests to the embedding service and results in a faster process. First all prospected questions are collected. Then, their embedding vectors are calculated one chunk after the other. Finally, the embedding vectors are inserted into each question document for insertion in the collection.
The collection is now populated with documents containing the question and answer data and the vector embeddings.
Backend API
The API is split between a few files:
-
index.pycontains the actual FastAPI code. It defines an API with a single route:/api/chat. Upon receipt of a POST request, the function calls thesend_to_openaifunction fromchatbot_utils.py. -
chatbot_utils.pyloads authentication credentials from your environment variables and connects to your database. It also defines the utilities to interact with the embedding and the LLM services.

Next steps
In this tutorial, you did the following:
-
Created a Serverless (vector) database.
-
Added data scraped from our FAQ pages.
-
Used the scraped data to add context to prompts to the OpenAI API.
-
Held a chat session with an LLM.
Next, try customizing the code to scrape your own sites, use different prompts, and redesign the frontend.
You can also try building apps with the Astra DB Data API clients. To get started with the clients, see the Astra DB Serverless quickstart for collections.
