Running an upgrade job for a DSE patch version
After cloning a configuration profile with an updated DSE minor version, run an upgrade job on a datacenter or node. The upgrade job downloads and installs DSE and applies the values in the associated configuration profile.
After reviewing the DataStax Enterprise (DSE) patch release upgrade documentation and cloning a configuration profile with an updated DSE minor version, run an upgrade job on a datacenter or node. The upgrade job downloads and installs DSE and applies the values in the associated, cloned configuration profile.
Read and understand the following characteristics of configuration profiles:
- LCM install and configure jobs fail if the installed DSE version does not match the version specified in the configuration profile associated with a cluster, datacenter, or node.
- Clusters using different versions of DSE do not inherit configuration profiles.
Automated DSE upgrades to minor versions within a release series are supported in Lifecycle Manager for versions 6.5 and later.
- Automated DSE upgrades to major versions.
- Downgrades of DSE.
Prerequisites
Procedure
- Clone the configuration profile and select an updated DSE version.
- Click Clusters in the Lifecycle Manager navigation menu.
- Select the datacenter or node to run an upgrade on.
- Click the ellipsis icon and select Edit, then choose the Config Profile to use for the upgrade. The selected configuration profile will be associated with the datacenter or node being upgraded.
-
Click the ellipsis icon and select Upgrade for the
datacenter or node being upgraded.
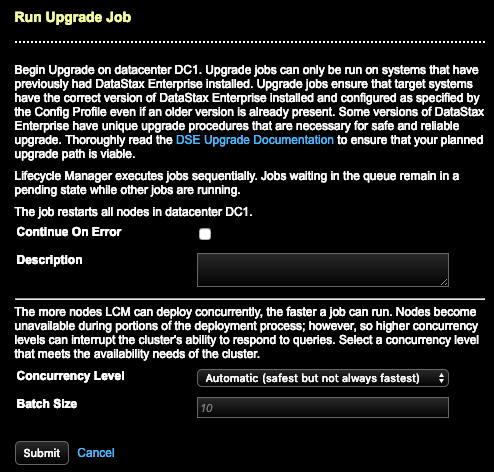
 The Run Upgrade Job dialog displays.Tip: Click the following thumbnail images to view the expanded dialog.
- Run Upgrade Job for a Node:

- Run Upgrade Job for a Datacenter:
- Run Upgrade Job for a Node:
-
To override the default error behavior and continue running the job on
subsequent nodes until all nodes are finished, select Continue On
Error. The job continues running despite encountering
errors.
By default, a job ceases running on additional nodes upon encountering an error on any given node. Any nodes that are already running continue to completion.
- Optional: Enter a Description about the upgrade job. For example: upgrade node from DSE 6.0.0 to 6.0.4. The description displays in the Jobs pages when Viewing job details.
-
Make additional selections depending on whether you are upgrading a node or a
datacenter.
- If running an upgrade job for a node, skip to 9.
- If running an upgrade job for a datacenter, continue with the following selections.
- Click Submit to submit the job. A dialog indicates that the job is in the queue to run.
- Click View Job Summary to navigate to the Jobs page to monitor the job progress. Click Close if you do not want to immediately monitor the job and prefer to remain in the Clusters workspace.