Deploy and manage Astra Streaming Pulsar functions
Functions are lightweight compute processes that you can run on each message a topic receives. You can apply custom logic to a message, transforming or enriching it, and then output it to a different topic.
Functions run inside Astra Streaming, which makes them serverless. You write the code for your function in Java, Python, or Go, and then upload the code. It automatically runs for each message published to the specified input topic.
Functions are implemented using Apache Pulsar™ functions.
|
Custom functions require a paid Astra Streaming plan. |
Deploy a function ZIP or JAR
You can write Pulsar functions for Astra Streaming in Python, Java, or Go.
To deploy a function to Astra Streaming or Pulsar, you can package the project into an archive, including the function code and any dependencies. You can deploy the same archive to either environment.
This is recommended for complex functions with long scripts, multiple scripts, or many dependencies. You can also use this approach to deploy multiple function classes with a single package.
Prepare a Python function for deployment
To create a Python function, the .zip file must have the correct structure.
For example, assuming a project named testpythonfunction, the extracted archive has the following structure:
/my-python-function
   python-code/my-python-function.zip
   python-code/deps/sh-1.12.14-py2.py3-none-any.whl
python-code/src/my-python-function.py-
Prepare the directory structure:
mkdir FUNCTION_NAME mkdir FUNCTION_NAME/python-code mkdir FUNCTION_NAME/python-code/deps/ mkdir FUNCTION_NAME/python-code/src/ touch FUNCTION_NAME/python-code/src/FUNCTION_NAME.py -
Write your function code in a
.pyfile. This example adds an exclamation point to the end of any messages.from pulsar import Function class ExclamationFunction(Function): def __init__(self): pass def process(self, input, context): return input + '!' -
Add dependencies to
/deps. This example uses thepulsar-clientlibrary.cd deps pip install pulsar-client==2.10.0 -
Create a
.zipfile at the root of the project:cd deps zip -r ../my-python-function.zip .
Prepare a Java function for deployment
To deploy a Java function, you must create a .jar file.
-
Create a Java project for your function.
-
Declare dependencies in
pom.xml:pom.xml<?xml version="1.0" encoding="UTF-8"?> <project xmlns="http://maven.apache.org/POM/4.0.0" xmlns:xsi="http://www.w3.org/2001/XMLSchema-instance" xsi:schemaLocation="http://maven.apache.org/POM/4.0.0 http://maven.apache.org/xsd/maven-4.0.0.xsd"> <modelVersion>4.0.0</modelVersion> <groupId>java-function</groupId> <artifactId>java-function</artifactId> <version>1.0-SNAPSHOT</version> <dependencies> <dependency> <groupId>org.apache.pulsar</groupId> <artifactId>pulsar-functions-api</artifactId> <version>3.0.0</version> </dependency> </dependencies> <build> <plugins> <plugin> <artifactId>maven-assembly-plugin</artifactId> <configuration> <appendAssemblyId>false</appendAssemblyId> <descriptorRefs> <descriptorRef>jar-with-dependencies</descriptorRef> </descriptorRefs> <archive> <manifest> <mainClass>org.example.test.ExclamationFunction</mainClass> </manifest> </archive> </configuration> <executions> <execution> <id>make-assembly</id> <phase>package</phase> <goals> <goal>assembly</goal> </goals> </execution> </executions> </plugin> <plugin> <groupId>org.apache.maven.plugins</groupId> <artifactId>maven-compiler-plugin</artifactId> <version>3.11.0</version> <configuration> <release>17</release> </configuration> </plugin> </plugins> </build> </project> -
Write your function code in your project.
-
Package the
.jarfile with Apache Maven™:mvn packageResult[INFO] ------------------------------------------------------------------------ [INFO] BUILD SUCCESS [INFO] ------------------------------------------------------------------------ [INFO] Total time: 10.989 s [INFO] Finished at: 2023-05-16T16:19:05-04:00 [INFO] ------------------------------------------------------------------------
Deploy the function with the Pulsar CLI
-
If you haven’t done so already, set up your environment for the Pulsar binaries.
-
Create a deployment configuration YAML file that defines the function metadata and associated topics:
func-create-config.yamlpy: PATH_TO_FUNCTION_ARCHIVE className: FILE_NAME.CLASS_NAME parallelism: 1 inputs: - persistent://TENANT_NAME/NAMESPACE_NAME/TOPIC_NAME output: persistent://TENANT_NAME/NAMESPACE_NAME/TOPIC_NAME autoAck: true tenant: TENANT_NAME namespace: NAMESPACE_NAME name: DISPLAY_NAME logTopic: userConfig: logging_level: ERRORReplace the following:
-
PATH_TO_FUNCTION_ARCHIVE: The path to the function archive. -
FILE_NAME.CLASS_NAME: The class to execute. An archive can contain multiple classes, but only one is used per deployment.-
For Python scripts, the
classNameis the Python filename (without the extension) and the class to execute, such aspythonfunc.ExclamationFunction. If there isn’t a class in the file, theclassNameis the filename without the extension, such aspythonfunc. -
For Java scripts, the
classNameis the path and the class to execute, such ascom.example.pulsar.ExclamationFunction.
-
-
TENANT_NAME/NAMESPACE_NAME/TOPIC_NAME: Define the tenant, namespace, and topic for bothinput(incoming messages passed to the function) andoutput(the results of the function).To avoid errors, make sure the
inputstopic (declared in your configuration YAML file) has a defined message schema before you deploy the function. You can define a topic’s message schema in the Astra Portal.Optionally, you can declare a
logTopicin the same way:persistent://TENANT_NAME/NAMESPACE_NAME/TOPIC_NAME. -
DISPLAY_NAME: The function display name in Astra Streaming, such astestpythonfunction.
-
-
Use
pulsar-adminto deploy the function to Astra Streaming or Pulsar using your configuration file:bin/pulsar-admin functions create --function-config-file PATH_TO_FUNCTION_CONFIG_YAMLA response of
Created Successfully!indicates the function is deployed and ready to accept messages.If the response is
402 Payment RequiredwithReason: only qualified organizations can create functions, then you must upgrade to a paid Astra Streaming plan.If your Python function contains only a single script and no dependencies, you can deploy the
.pyfile directly, without packaging it into a.zipfile or creating a configuration file:./pulsar-admin functions create \ --py PATH_TO_PYTHON_FILE \ --classname FILE_NAME.CLASS_NAME \ --tenant TENANT_NAME \ --namespace NAMESPACE_NAME \ --name DISPLAY_NAME \ --auto-ack true \ --inputs persistent://TENANT_NAME/NAMESPACE_NAME/TOPIC_NAME \ --output persistent://TENANT_NAME/NAMESPACE_NAME/TOPIC_NAME \ --log-topic persistent://TENANT_NAME/NAMESPACE_NAME/TOPIC_NAMEIf there isn’t a class in the file, the
classNameis only the filename without the extension. -
Verify the deployment:
bin/pulsar-admin functions list --tenant TENANT_NAME --namespace NAMESPACE_NAMEYou can also check the Astra Portal to confirm the function is listed on the tenant’s Functions tab.
See Controlling your function for more information on testing and monitoring your function in Astra Streaming.
Deploy functions in the Astra Portal
In the Astra Portal, you can deploy your own function code and built-in DataStax transform functions.
Deploy custom functions in the Astra Portal
-
In the Astra Portal header, click Applications, and then select Streaming.
-
Click the name of the tenant where you want to deploy a function.
-
On the Functions tab, click Create Function.
-
Enter a function name.
-
Select Upload my own code.
-
Select your function file:
-
.py: A single, independent Python script -
.zip: A Python script with dependencies -
.jar: A Java function -
.go: A Go function
For examples, see Prepare a Python function for deployment and Prepare a Java function for deployment.
-
-
Based on the uploaded file, select the specific class (function) to deploy.
Astra Streaming generates a list of acceptable classes detected in the code. A file can contain multiple classes, but only one is used per deployment.
For Python scripts, the class name is the Python filename (without the extension) and the class to execute. For example, if the Python file is called
testfunction.pyand the class isExclamationFunction, then the class name istestfunction.ExclamationFunction. If there isn’t a class in the Python file, the class name is the filename without the extension, such astestfunction.For Java scripts, the class name is the class to execute.

-
Select the namespace and one or more input topics for the function.
-
If needed, select an output namespace and topics.
Whether you need to specify an output topic depends on the function’s logic. For example, the
casttransform function needs an output topic to receive the transformed messages. -
Optional: Select a log topic.
The log topic is a separate output topic for messages containing additional
loglevel,fqn, andinstanceproperties. -
Optional: Configure advanced settings:
-
Instances: Enter a number of sink instances to run.
-
Processing Guarantee: Select one of the following:
-
ATLEAST_ONCE (default): Each message sent to the function can be processed one or more times.
-
ATMOST_ONCE: Each message sent to the function is processed 0 or 1 times. This means there is a change that a message is not processed.
-
EFFECTIVELY_ONCE: Each message sent to the function has only one output associated with it.
-
-
Timeout: Set a timeout limit.
-
Auto Acknowledge: Enable or disable automatic message acknowledgment.
-
-
If needed, provide a JSON-formatted config key for your function. This configuration depends on your function code.
-
Click Create.
-
Confirm your function was created on the Functions tab.
You can also verify the function deployment with the Pulsar CLI:
./bin/pulsar-admin functions list --tenant $TENANT
Once created, the function starts processing messages from the input topics according to its logic.
Deploy DataStax transform functions in the Astra Portal
To deploy built-in DataStax transform functions, you select the function you want to deploy and provide a JSON-formatted config key, if you want to use a non-default configuration. For more information, see the transform functions configuration reference.
-
In the Astra Portal header, click Applications, and then select Streaming.
-
Click the name of the tenant where you want to deploy a function.
-
On the Functions tab, click Create Function.
-
Enter a function name.
-
Select Use DataStax transform function.
-
Select the transform function that you want to use.
-
Select the namespace and one or more input topics for the function.
-
If needed, select an output namespace and topics.
Whether you need to specify an output topic depends on the function’s logic. For example, the
casttransform function needs an output topic to receive the transformed messages. -
Optional: Select a log topic.
The log topic is a separate output topic for messages containing additional
loglevel,fqn, andinstanceproperties. -
Optional: Configure advanced settings:
-
Instances: Enter a number of sink instances to run.
-
Processing Guarantee: Select one of the following:
-
ATLEAST_ONCE (default): Each message sent to the function can be processed one or more times.
-
ATMOST_ONCE: Each message sent to the function is processed 0 or 1 times. This means there is a change that a message is not processed.
-
EFFECTIVELY_ONCE: Each message sent to the function has only one output associated with it.
-
-
Timeout: Set a timeout limit.
-
Auto Acknowledge: Enable or disable automatic message acknowledgment.
-
-
If needed, provide a JSON-formatted config key for your function. This configuration depends on your function code.
-
Click Create.
-
Confirm your function was created on the Functions tab.
You can also verify the function deployment with the Pulsar CLI:
./bin/pulsar-admin functions list --tenant $TENANT
Once created, the function starts processing messages from the input topics according to its logic.
Deploy functions in sinks
By default, functions modify data either after it is written to a topic by a source connector, or before it is read from a topic by a sink connector. This requires either a custom connector or an intermediate topic (with additional storage, IO, and latency).
Alternatively, you can deploy functions in a sink to apply preprocessing to sink topic writes (outgoing messages from the sink).
To deploy a function in a sink, create a sink, and include the function in your sink configuration. You can do this in the Astra Portal, with the Pulsar CLI, or with Astra Streaming Pulsar Admin API.
For example, with the Astra Portal:
-
In the Astra Portal header, click Applications, and then select Streaming.
-
Click the name of the tenant where you want to create the sink.
-
Click the Sinks tab, and then click Create Sink.
-
Configure the sink and select a function to deploy with the sink.
-
Click Create, and then wait for the sink to initialize.
When the sink is ready, its status changes to Running.
-
When the sink is running, inspect the sink connector’s log to verify that the function was loaded at sink creation. For example:
2022-11-14T15:01:02.398190413Z 2022-11-14T15:01:02,397+0000 [main] INFO org.apache.pulsar.functions.runtime.thread.ThreadRuntime - ThreadContainer starting function with instanceId 0 functionId f584ae69-2eda-449b-9759-2d19fd7c4da5 namespace astracdc
Manage deployed functions
After you deploy a function, you can test, start, stop, monitor, edit, and delete it.
Test functions
To test the function, publish a message to the function’s input topic or use pulsar-admin functions trigger.
If the function produces output and it has an output topic, the output data is returned.
-
Listen for messages on the
outputtopic:./pulsar-client consume persistent://**TENANT_NAME**/**NAMESPACE_NAME**/**TOPIC_NAME** \ --subscription-name my-subscription \ --num-messages 0 # Listen indefinitely -
Test your function:
./pulsar-admin functions trigger \
--name **FUNCTION_DISPLAY_NAME** \
--tenant **TENANT_NAME** \
--namespace **NAMESPACE_NAME** \
--trigger-value "**MESSAGE**"
The trigger sends the message string to the function. Your function should output the result of processing the message.
Stop and start functions
-
In the Astra Portal header, click Applications, and then select Streaming.
-
Click the name of the tenant where you want to manage functions, and then click the Functions tab.
-
Use Function Controls to start, stop, and restart functions.
Monitor functions
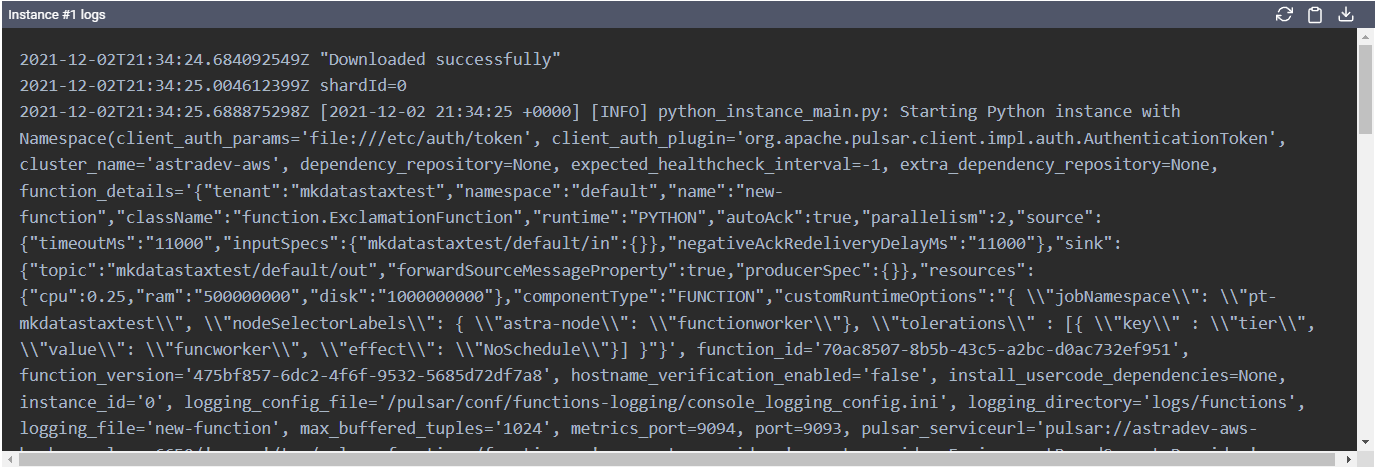
Functions produce logs to help you debug them.
-
In the Astra Portal header, click Applications, and then select Streaming.
-
Click the name of the tenant that you want to debug, and then click the Functions tab.
-
From here, you can view, refresh, copy, and download your functions' logs.
If you specified a log topic when deploying your function, function logs also output to that topic.
Edit functions
-
In the Astra Portal header, click Applications, and then select Streaming.
-
Click the name of the tenant where your function is deployed, and then click the Functions tab.
-
Click Update Function, edit the following settings as needed, and then click Update:
-
Function code
-
Output topic
-
Log topic
-
Number of instances
-
Configuration keys
-
If you need to change any other function settings, you must delete and redeploy the function with the desired settings.
Delete functions
|
Deleting a function is permanent. |
-
In the Astra Portal header, click Applications, and then select Streaming.
-
Click the name of the tenant where you want to delete a function, and then click the Functions tab.
-
Click the function you want to delete, and then click Delete.
-
To confirm deletion, enter the function’s name, and then click Delete.
