Manage notebooks in DataStax Studio
To create a notebook, on the Notebooks page, click Add Notebook. For more information, see Create a notebook in DataStax Studio.
After you create a notebook, you can manage the notebook’s settings and history.
Browse notebooks
When you first navigate to your DataStax Studio server in a web browser, DataStax Studio opens to the Notebooks page with notebooks sorted by most recent activity.
When viewing or editing a notebook, you can select Notebooks from the menu (☰) to return to the Notebooks page.
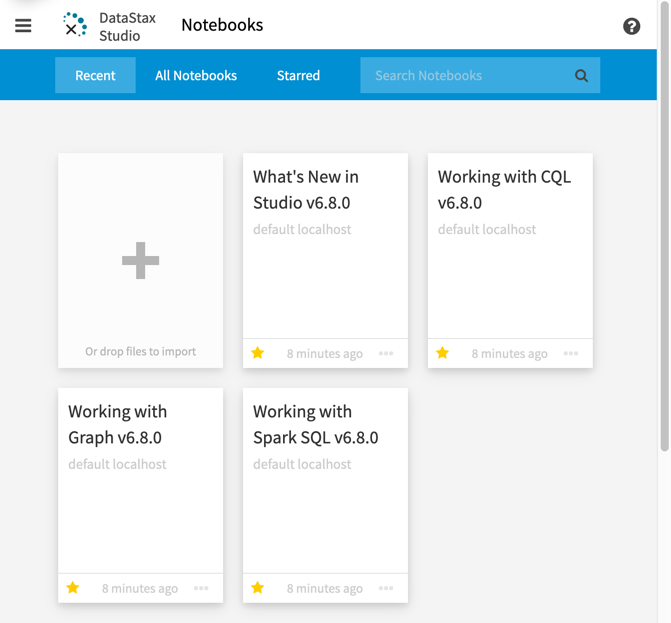
To browse all notebooks, click All Notebooks.
To view your favorite notebooks, click Starred.
To search for a notebook, enter the notebook name in the Search Notebooks field.
Edit notebook settings
You can change the name, connection, and graph settings for each notebook:
-
Open the configuration settings:
-
When editing a notebook, click the menu (☰), and then select Configure this Notebook.
-
On the Notebook Manager page, find the notebook you want to edit, click More, and then click Configure this Notebook.
-
-
Change the notebook settings as desired:
-
Name: Notebook names must be unique across all of your notebooks.
-
Connection: Each notebook can have only one connection.
-
Graph: For notebooks with Gremlin cells, each notebook is connected to a particular graph. Multiple notebooks can be connected to the same graph.
The connection defines the graph and assigns a graph traversal (g) for that graph, which allows DataStax Studio to run queries with DSE Graph. A graph traversal is the mechanism for visiting each vertex in a graph, based on the filters defined in the graph traversal. For more information about Graph connections, see DataStax Graph Quickstart.
-
Notebook controls
When viewing or editing a notebook, the following controls are available for the notebook as a whole. For cell-level controls, see Create and run notebook cells in DataStax Studio.
-
Information:
-
For non-Graph notebooks, this control shows the name of the cluster connection being used by the notebook, the timestamp of the notebook’s most recent edit, and the DataStax Studio JAR version.

-
For notebooks with Gremlin cells, this control shows the current graph schema for the notebook.

-
-
 View Schema: Switch to schema view to interact with contextual views of data.
The following controls are available in schema view:
View Schema: Switch to schema view to interact with contextual views of data.
The following controls are available in schema view:-
Reset Selections: Reset drop down selections.
-
Dock to Top: Dock schema to the top.
-
Dock to Side: Dock schema to the side.
-
-
View History: Use notebook history to view and manage notebook snapshots.
-
Add Cell: Add a cell in the current location.
Use notebook history
DataStax Studio automatically saves notebook revisions (snapshots) as you work so you can restore the notebook to a previous state if needed. These snapshots occur at periodic intervals and immediately before applying the following major changes:
-
Cell added
-
Cell deleted
-
Cell language changed
-
Cell schema created or modified
-
Cell view changed (for cells that contain returned data)
-
Cell view settings changed (for cells that contain returned data)
-
Code changed (for cells that contain executable code)
-
Gremlin Execution Engine run configuration changed
-
Notebook reverted to an earlier version using notebook history
In the notebook history, you can browse, preview, and restore snapshots. You can also label specific revisions to track your changes and identify key points in the notebook’s development.
In any notebook, click View History to open the Notebook History pane. By default, all revisions are listed in descending date order.

To label a revision, edit the description to the right of the snapshots.
To filter revisions, use one or more of the following options:
-
Filter revisions by event type: Click the All Changes filter in the Notebook History header, and then select a change event.
-
To search for a revision by label, enter text in the Search Revisions field. The results are filtered as you type.
-
View only labeled revisions, click Named Revisions.
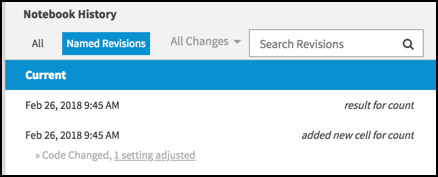
To view a specific revision, click the revision date. The notebook preview is read-only.
To restore a revision, click Restore Revision. The notebook history is updated, and the notebook’s contents are reverted to the selected revision.
To delete a revision, hover over the revision and click Delete.
Export a notebook
You can export a notebook as custom JSON in a .studio-nb.tar compressed file:
-
Start the export:
-
On the Notebooks page, find the notebook you want to export, click More, and then click Export.
-
When viewing a notebook, click the menu (☰), and then select Export this Notebook.
-
-
Select export options:
-
Cell code and result sets: Export the entire notebook with code and results. Useful for collaborating and sharing both queries and their output.
-
Cell code only: Export only the cell code of the notebook. Results are omitted. Useful for creating a clean copy of the notebook, such as for a tutorial.
-
Include diagnostics: Optional addition to either of the preceding options. Export the notebook with diagnostic data for troubleshooting purposes. This can include sensitive information, but credentials aren’t included.
-
-
Click Export.
The notebook is exported to your browsers default download location as packaged compressed file named
NOTEBOOK_NAME_DATE.studio-nb.tar. -
Import your notebook into another DataStax Studio instance, or share it with others to import into their own DataStax Studio instances.
Import a notebook
You can import DataStax Studio notebook files into DataStax Studio with the following limitations:
-
Only notebooks exported from DataStax Studio can be imported because the file is a packaged compressed file of custom JSON.
-
Compressed files cannot be imported; uncompress the
.studio-nb.tarfile before importing. -
Each version of DataStax Studio uses a different format. When you start DataStax Studio after an upgrade, all of your existing notebooks are upgraded to the new version. Notebooks aren’t backward compatible.
-
DataStax Studio 2.0 doesn’t support either export or import.
To import a notebook, go to the Notebooks page, and then drag and drop the notebook file from your file system. Alternatively, you can click Add Notebook, and then click Import.
If an imported notebook has the same name as an existing notebook, a numeric suffix is appended to the imported notebook’s name, such as (1) and (2).
The contents of an imported notebook is defined when it is exported. For example, a notebook that was exported with cell code only is imported without result sets.
