Use the visual editor
This page explores the fundamental building blocks of Langflow, beginning with the question, "What is a flow?"
What is a flow?
A flow is an application. It receives input, processes it, and produces output.
Flows are created in the workspace with components dragged from the components sidebar.
A flow can be as simple as the basic prompting flow, which creates an OpenAI chatbot with four components.
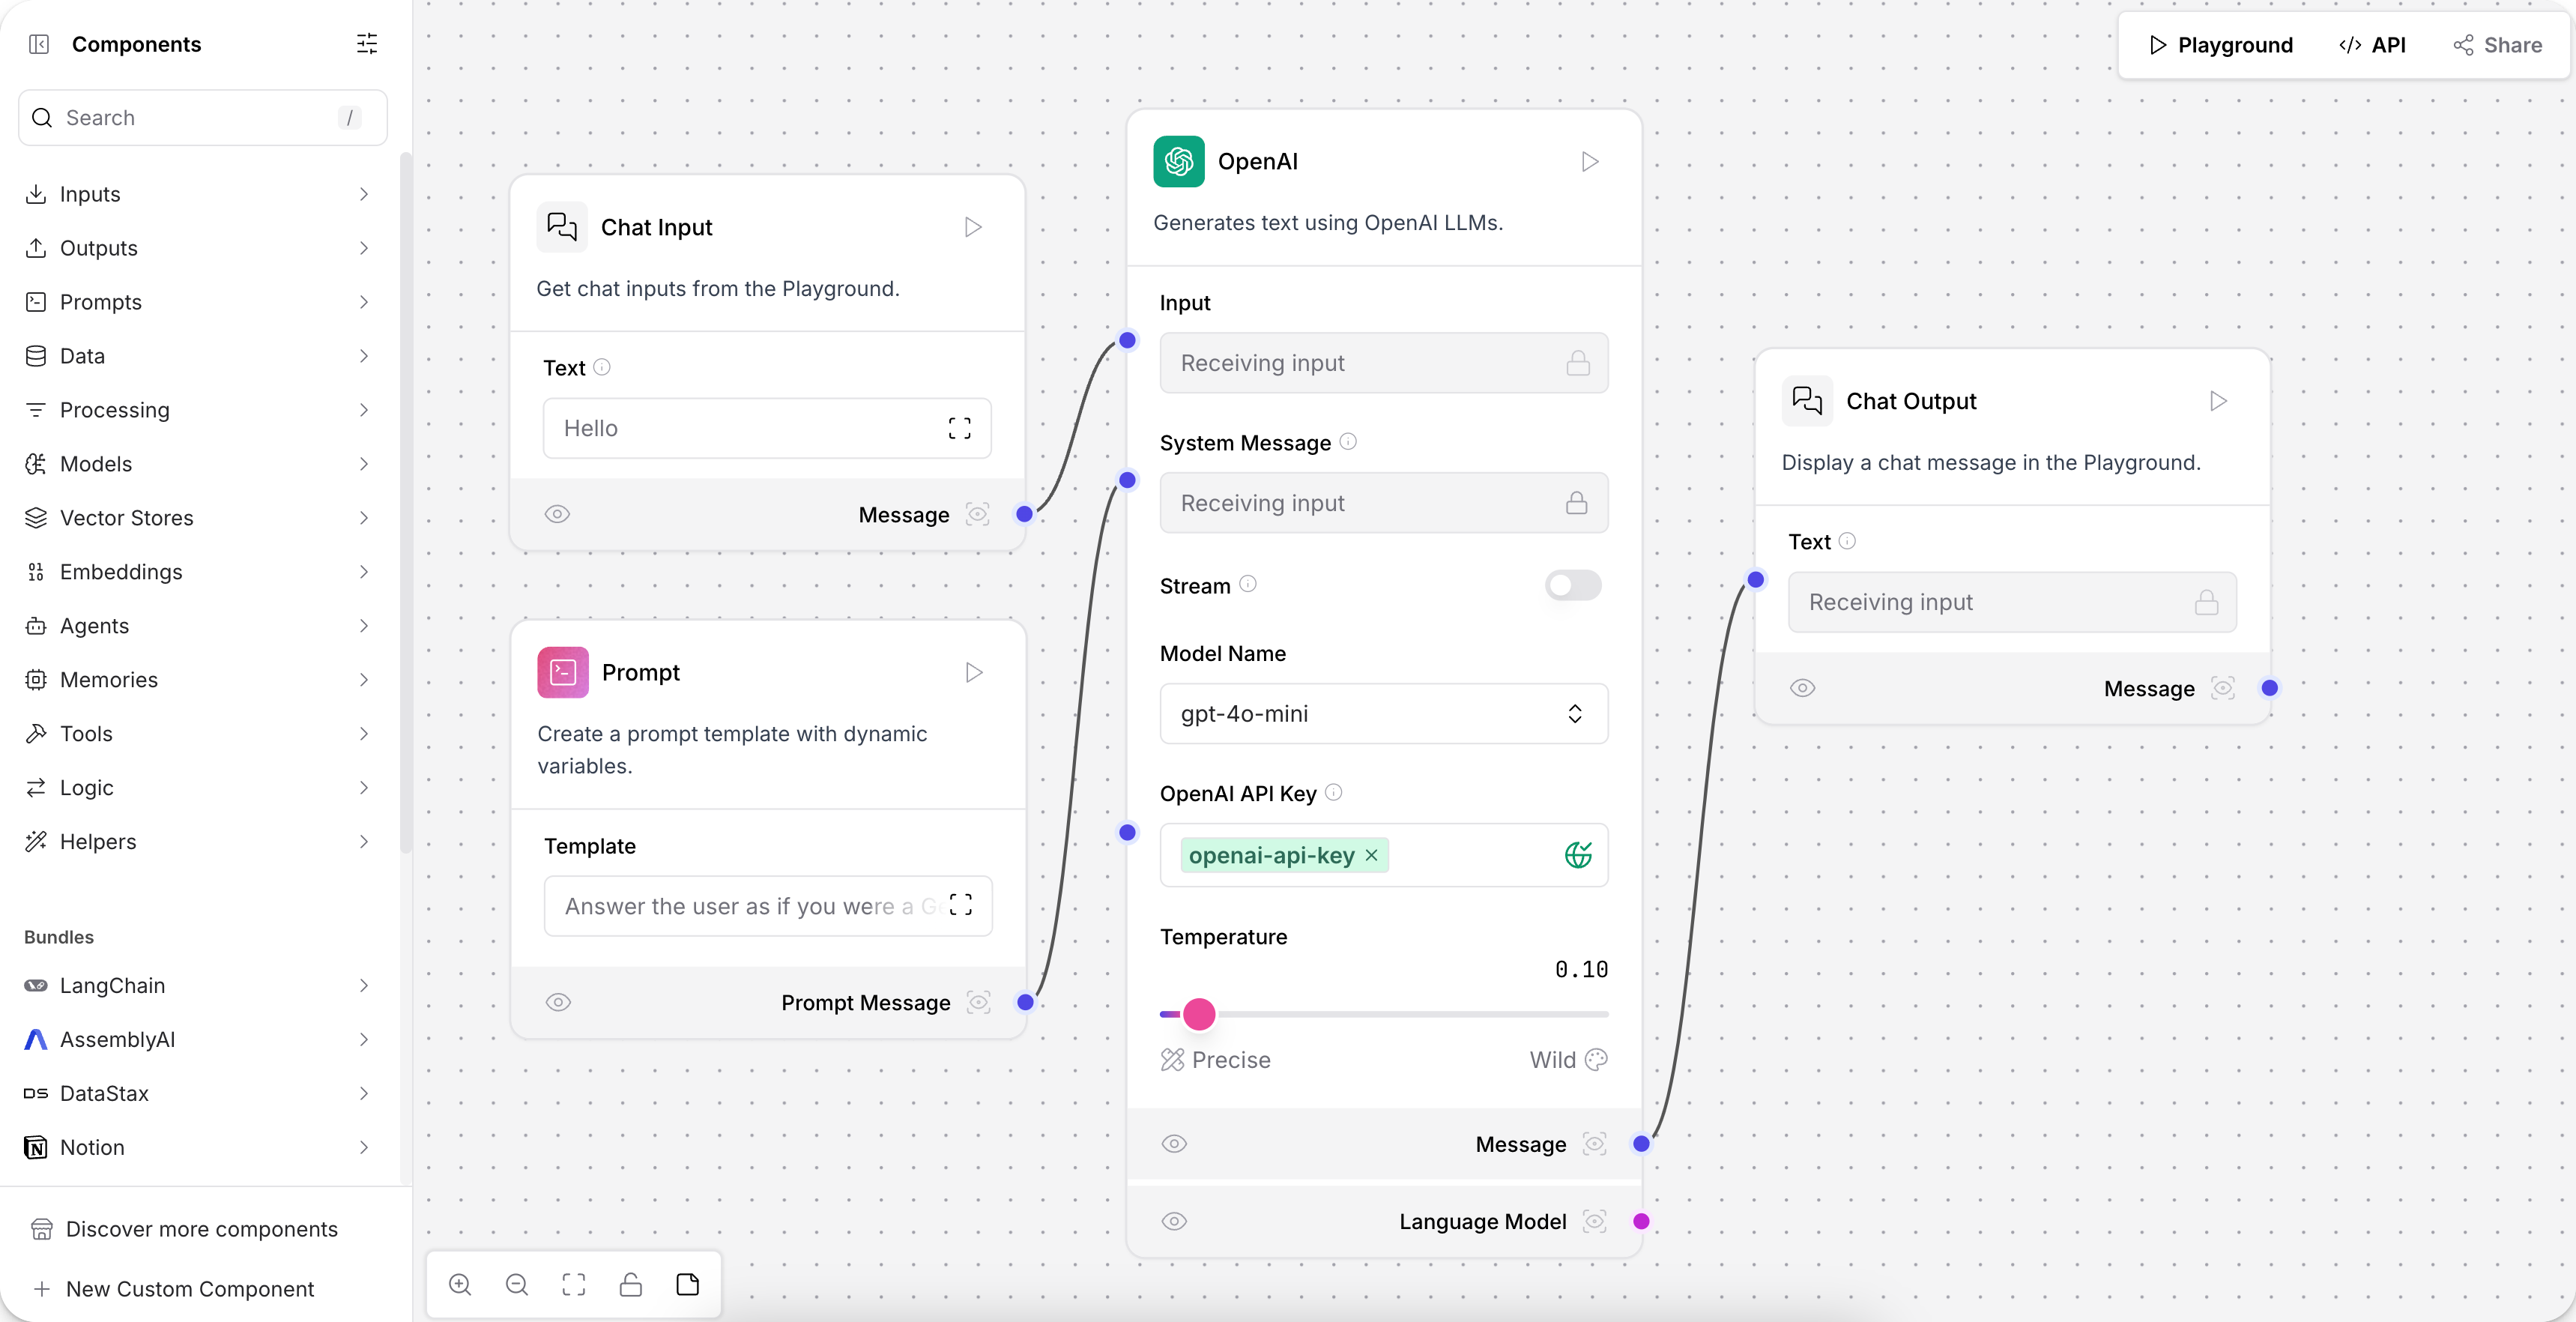
Flows are created in the Workspace with components dragged from the components sidebar.
-
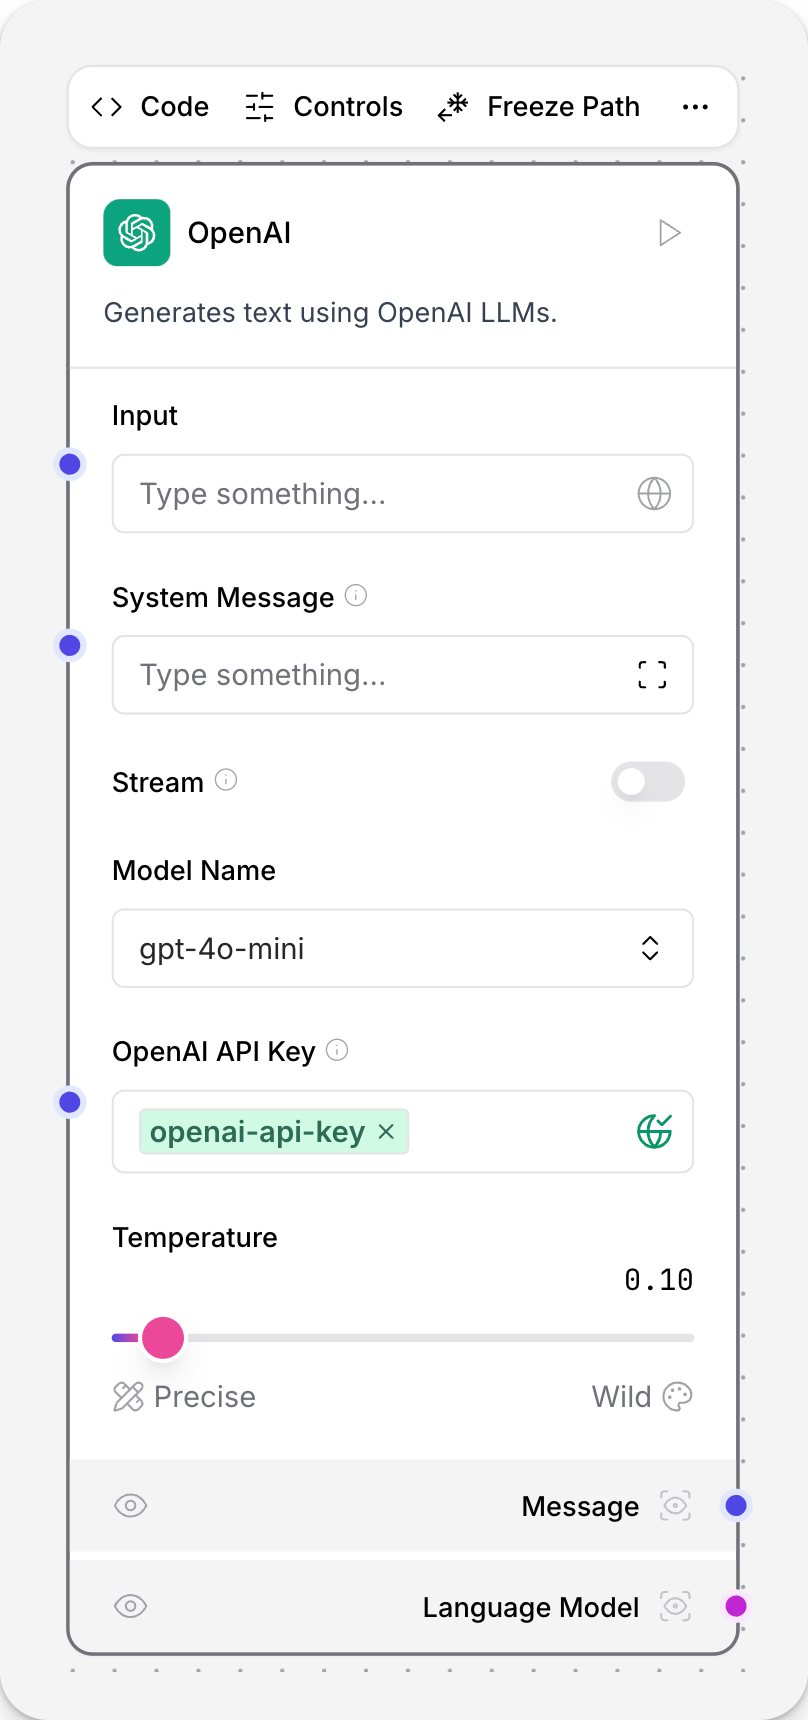
Each component in a flow is a node that performs a specific task, like an AI model or a data source.
-
Each component has a Configuration menu. Click the Code pane to see a component’s underlying Python code.
-
Components are connected with edges to form flows.
If you’re familiar with React Flow, a flow is a node-based application, a component is a node, and the connections between components are edges.
When a flow is run, Langflow builds a Directed Acyclic Graph (DAG) graph object from the nodes (components) and edges (connections between components), with the nodes sorted to determine the order of execution. The graph build calls the individual components' def_build functions to validate and prepare the nodes. This graph is then processed in dependency order. Each node is built and executed sequentially, with results from each built node being passed to nodes that are dependent on the previous node’s results.
For more, see Flows.
Find your way around
DataStax Langflow has four distinct regions: the Workspace is the main area where you build your flows. The components sidebar is on the left, and lists the available Components. The Playground and Publish pane are available in the upper right corner.
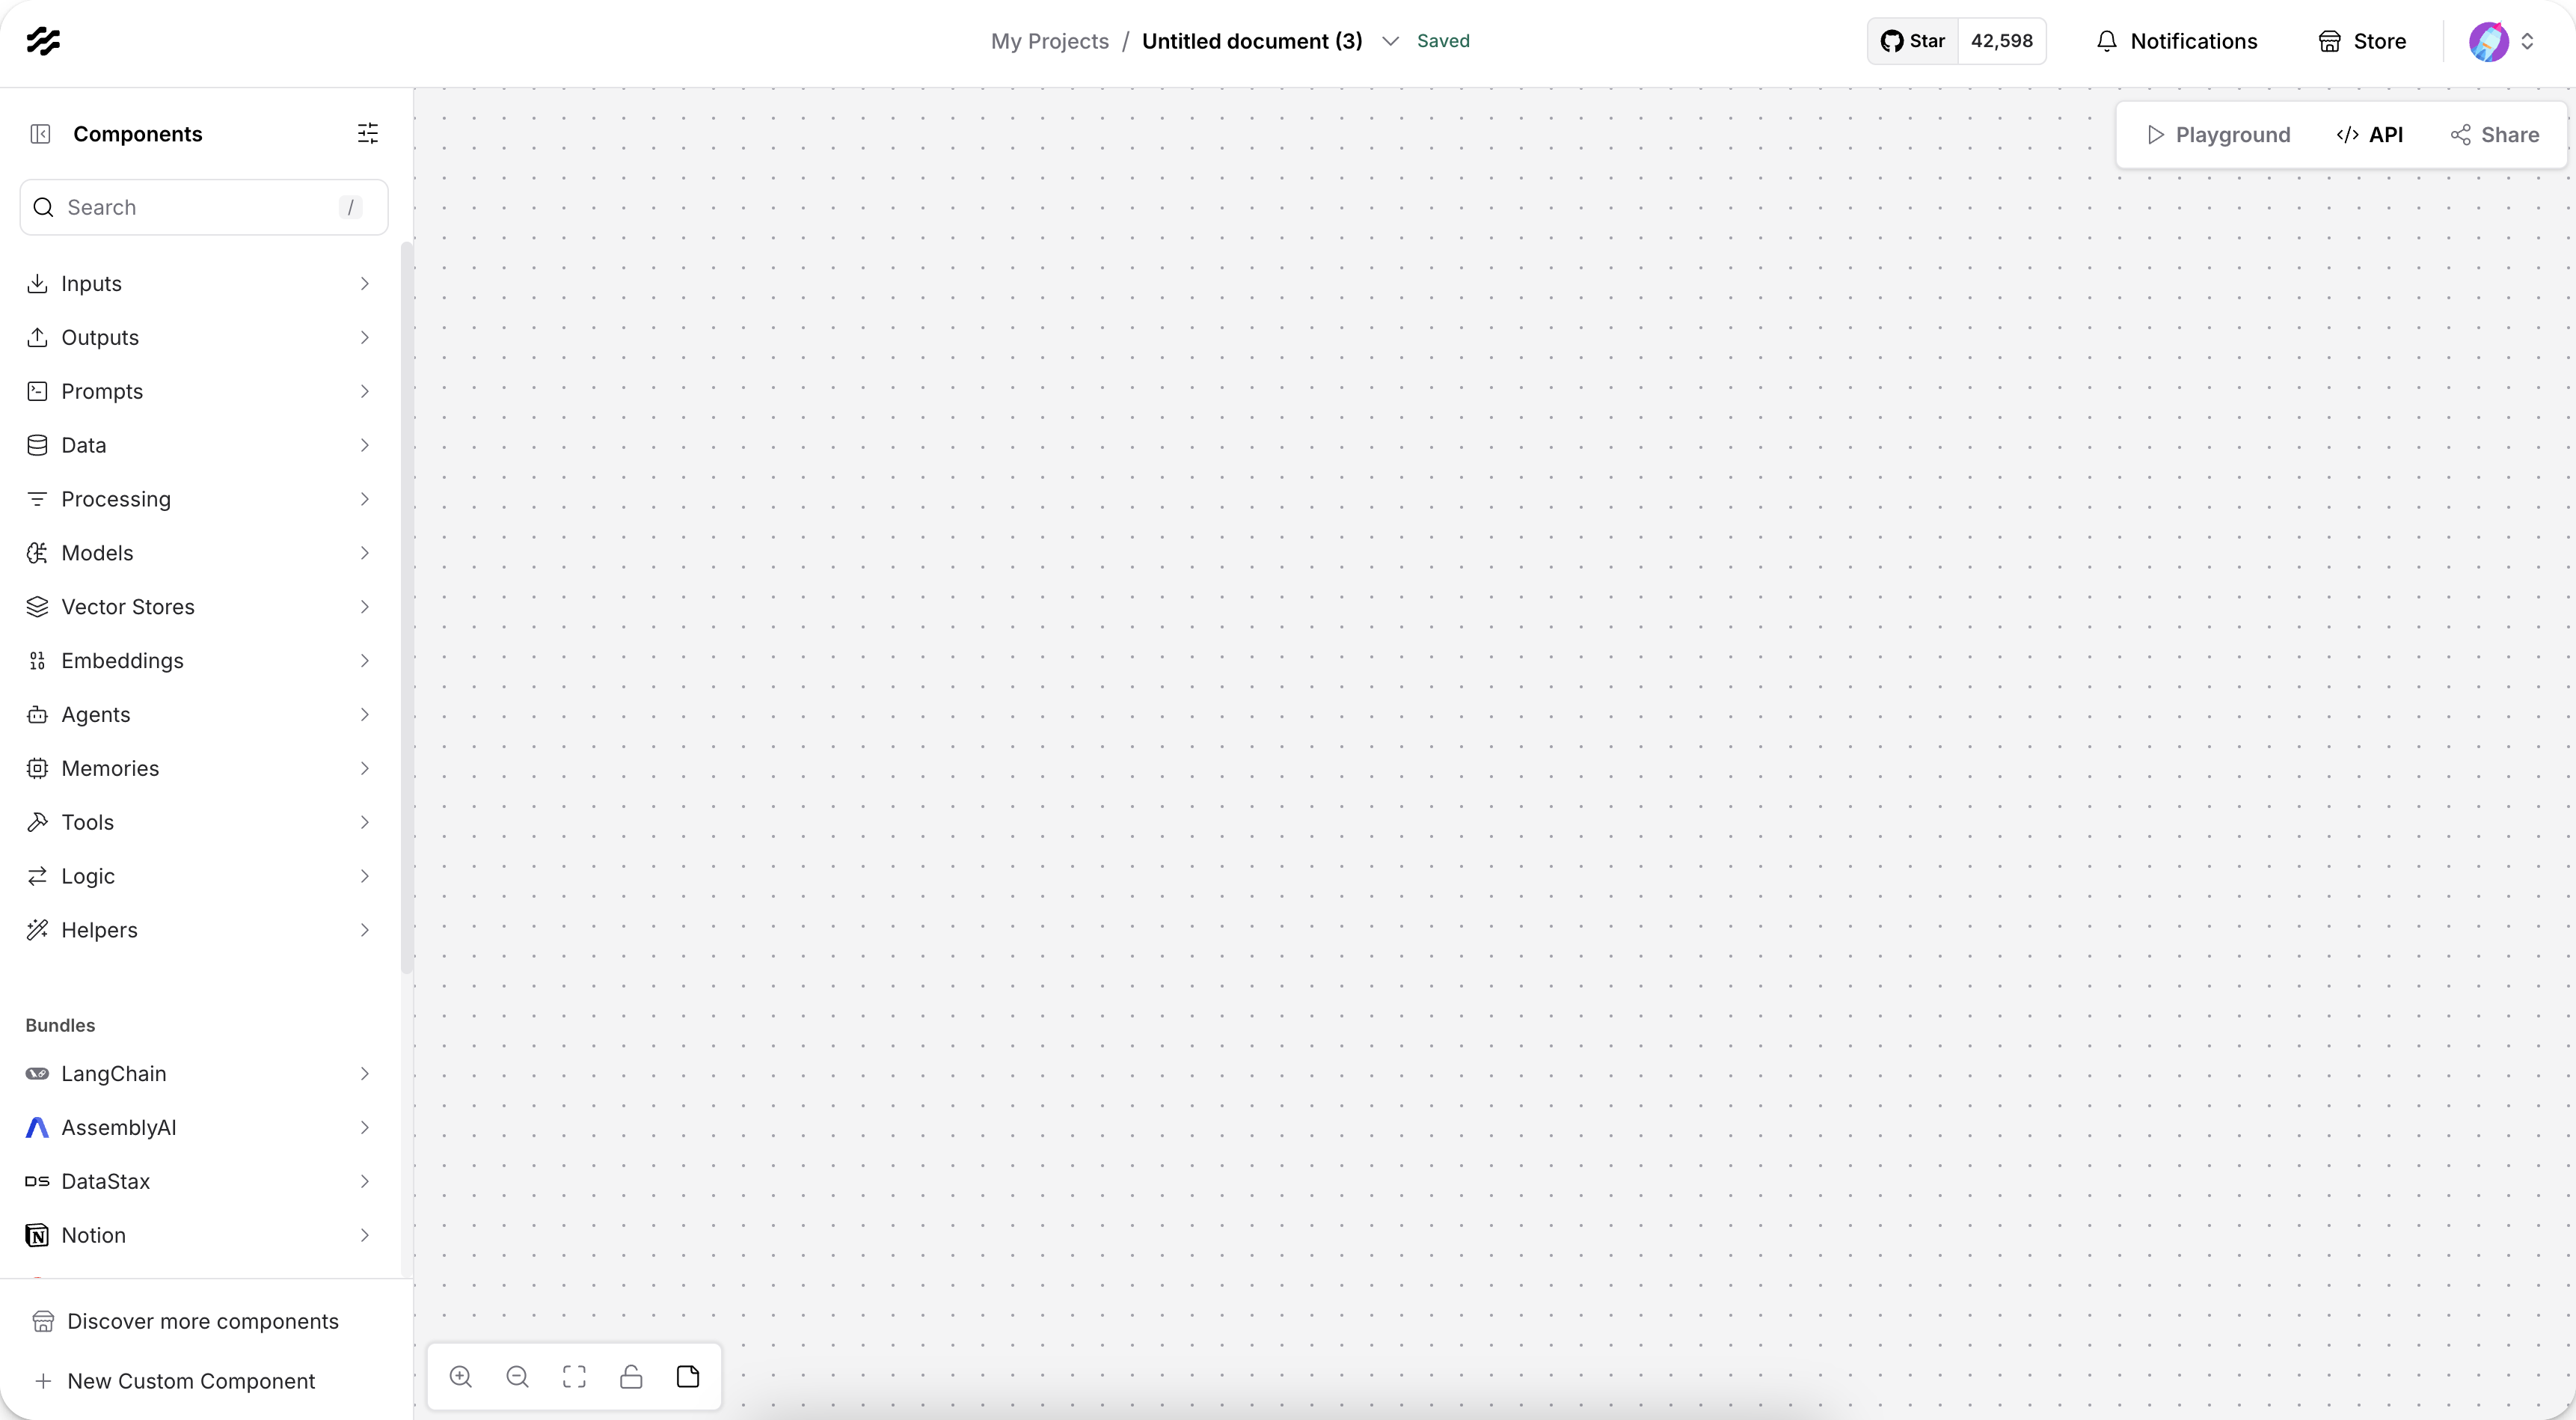
Workspace
The Workspace is where you create AI applications by connecting and running components in flows.
The workspace controls allow you to adjust your view and lock your flows in place.
-
Add Notes to flows with the Add Note button, similar to commenting in code.
-
To access the Settings menu, click Settings.
This menu contains configuration for Global Variables, Shortcuts, and Messages.
Components
A component is a single building block within a flow and consists of inputs, outputs, and parameters that define its functionality.
To add a component to your flow, drag it from the sidebar onto the workspace.
To connect components, drag a line from the output handle () of one component to the input handle of another.
For more information, see Components.
Custom components
Create your own components with the New Custom Component button. A custom component is built from your own Python code.
For more, see Custom components.
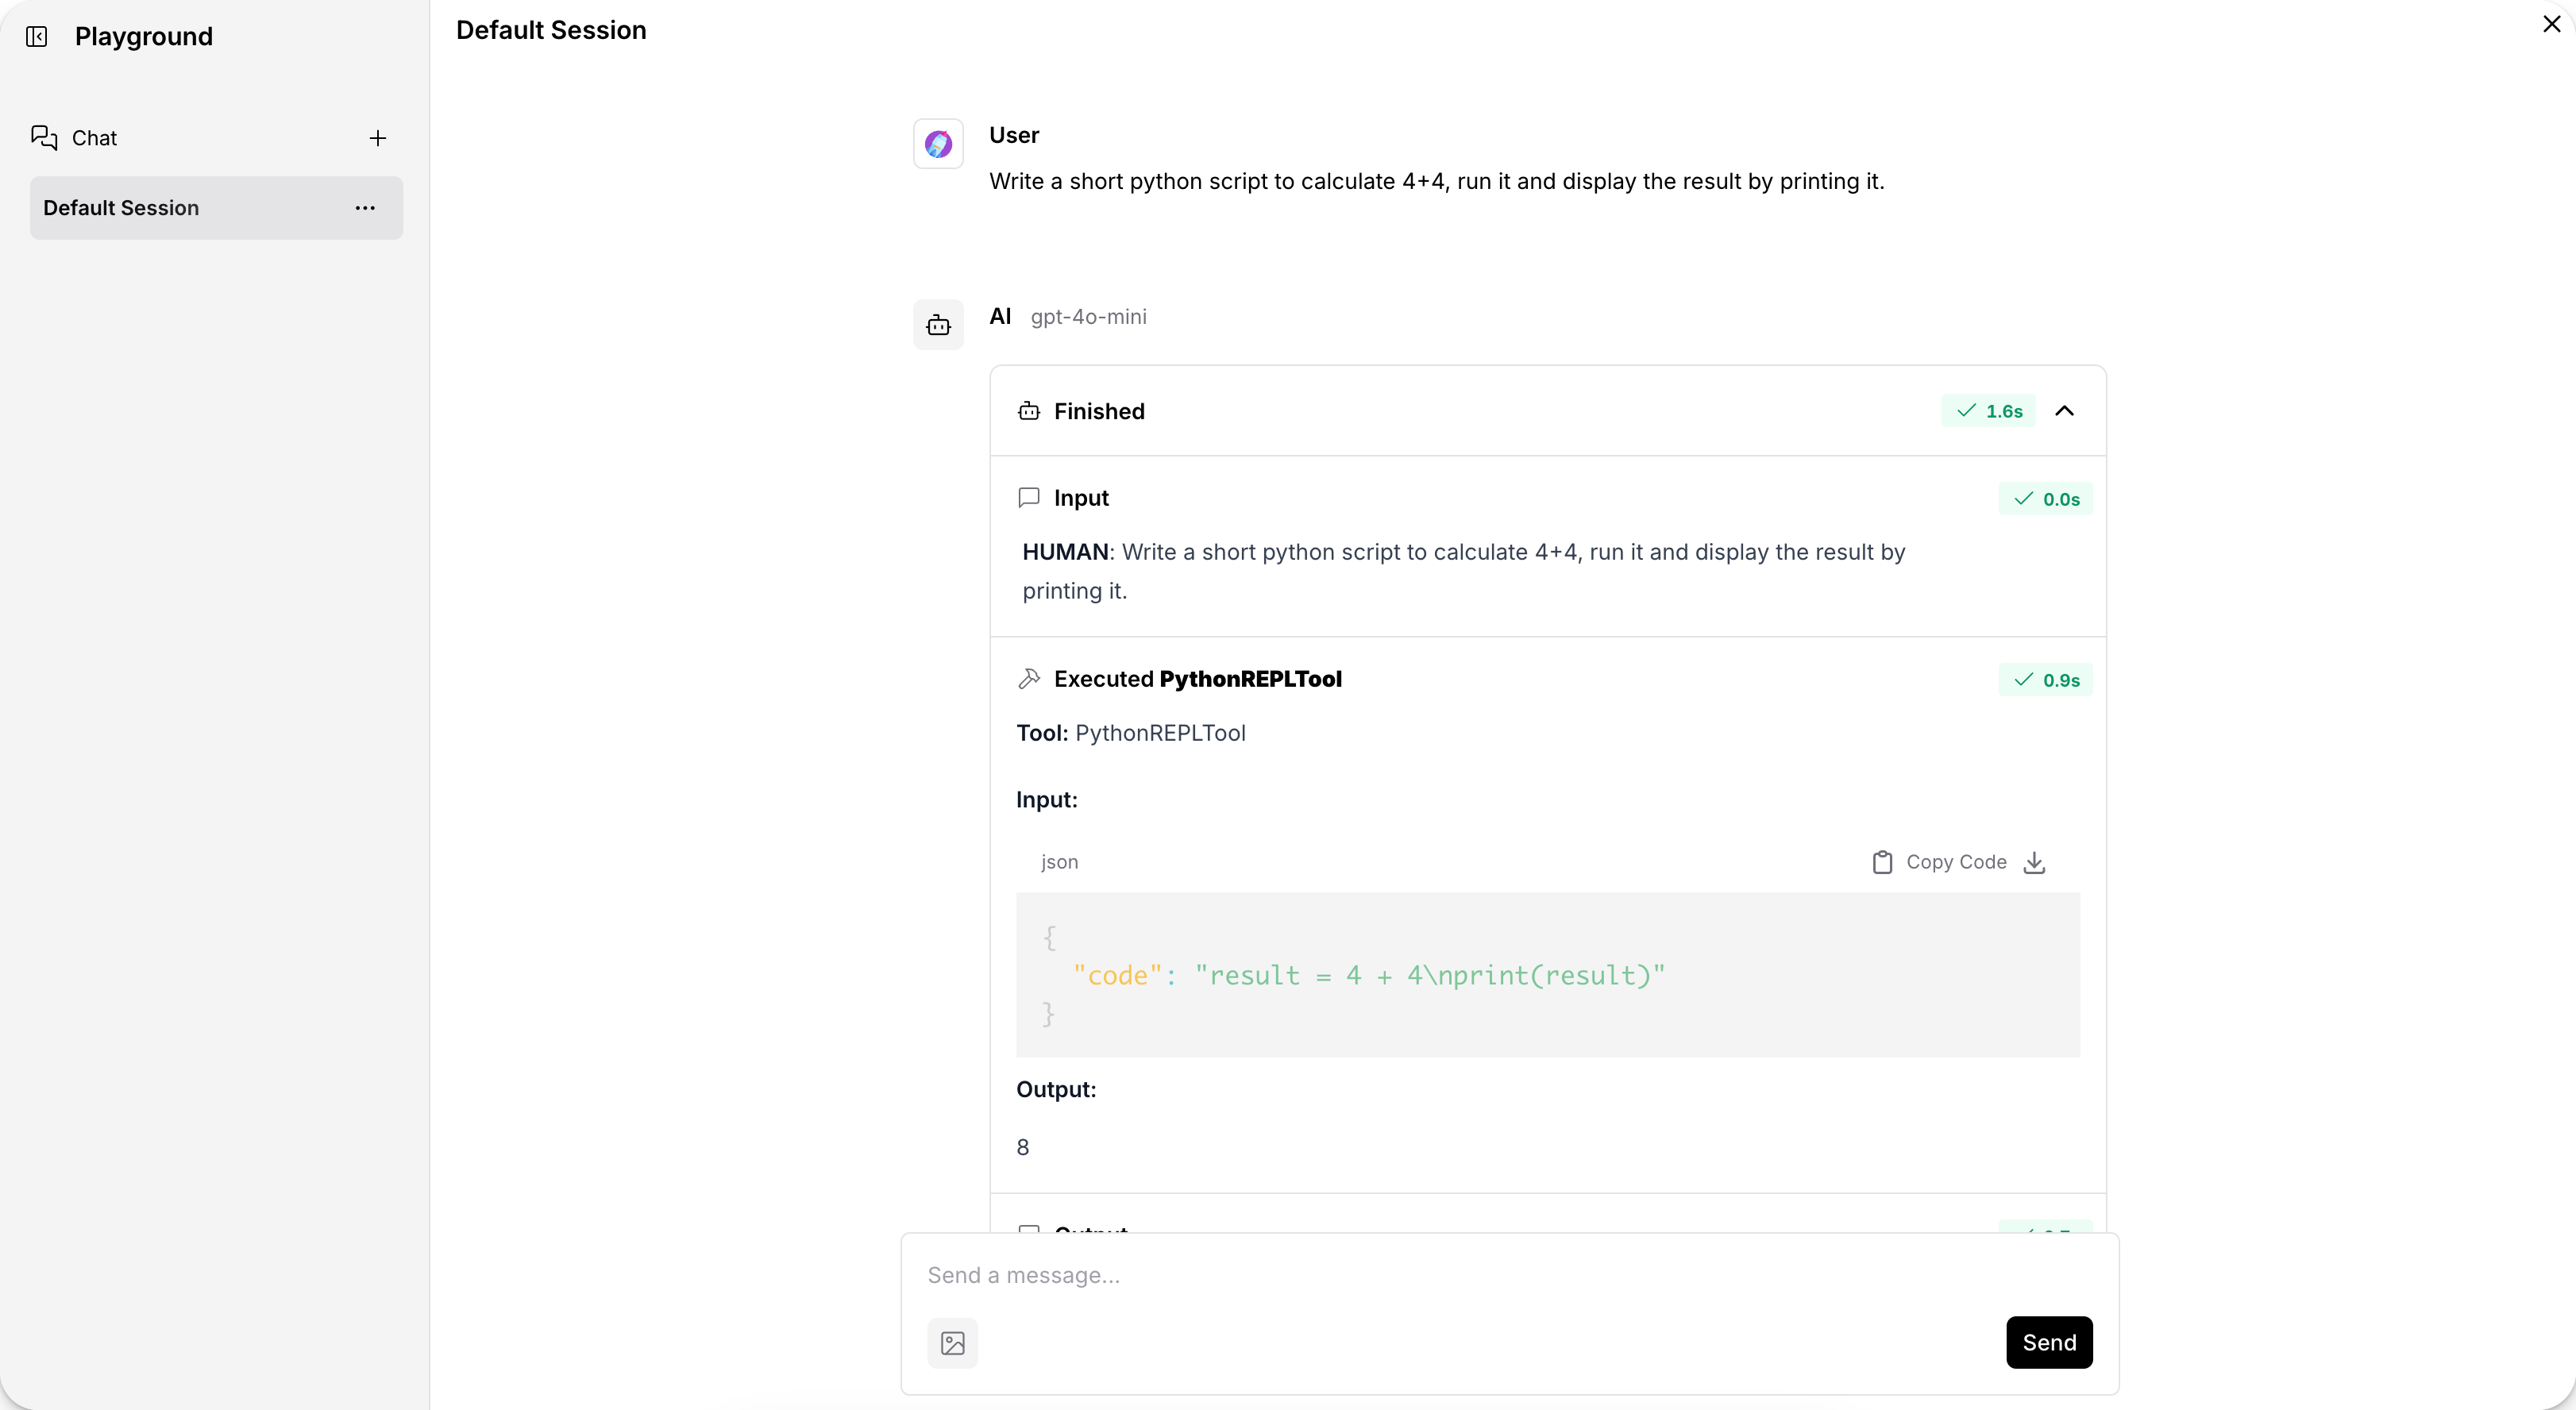
Playground
The Playground executes the current flow in the workspace.
Chat with your flow, view inputs and outputs, and modify your AI’s memories to tune your responses in real time.
Either the Chat Input or Chat Output component can be opened in the Playground and tested in real time.
As long as you have an Input or Output component in your flow, you can view the AI interaction by clicking the Playground button.
-
To see how your flow responds, enter text in the Message field.
-
To view message logs, click , and then click Message Logs.
-
To send images to your AI, click the button.
-
Test Agents in the playground to see what tools they select and what results they produce.
For more information, see Playground.
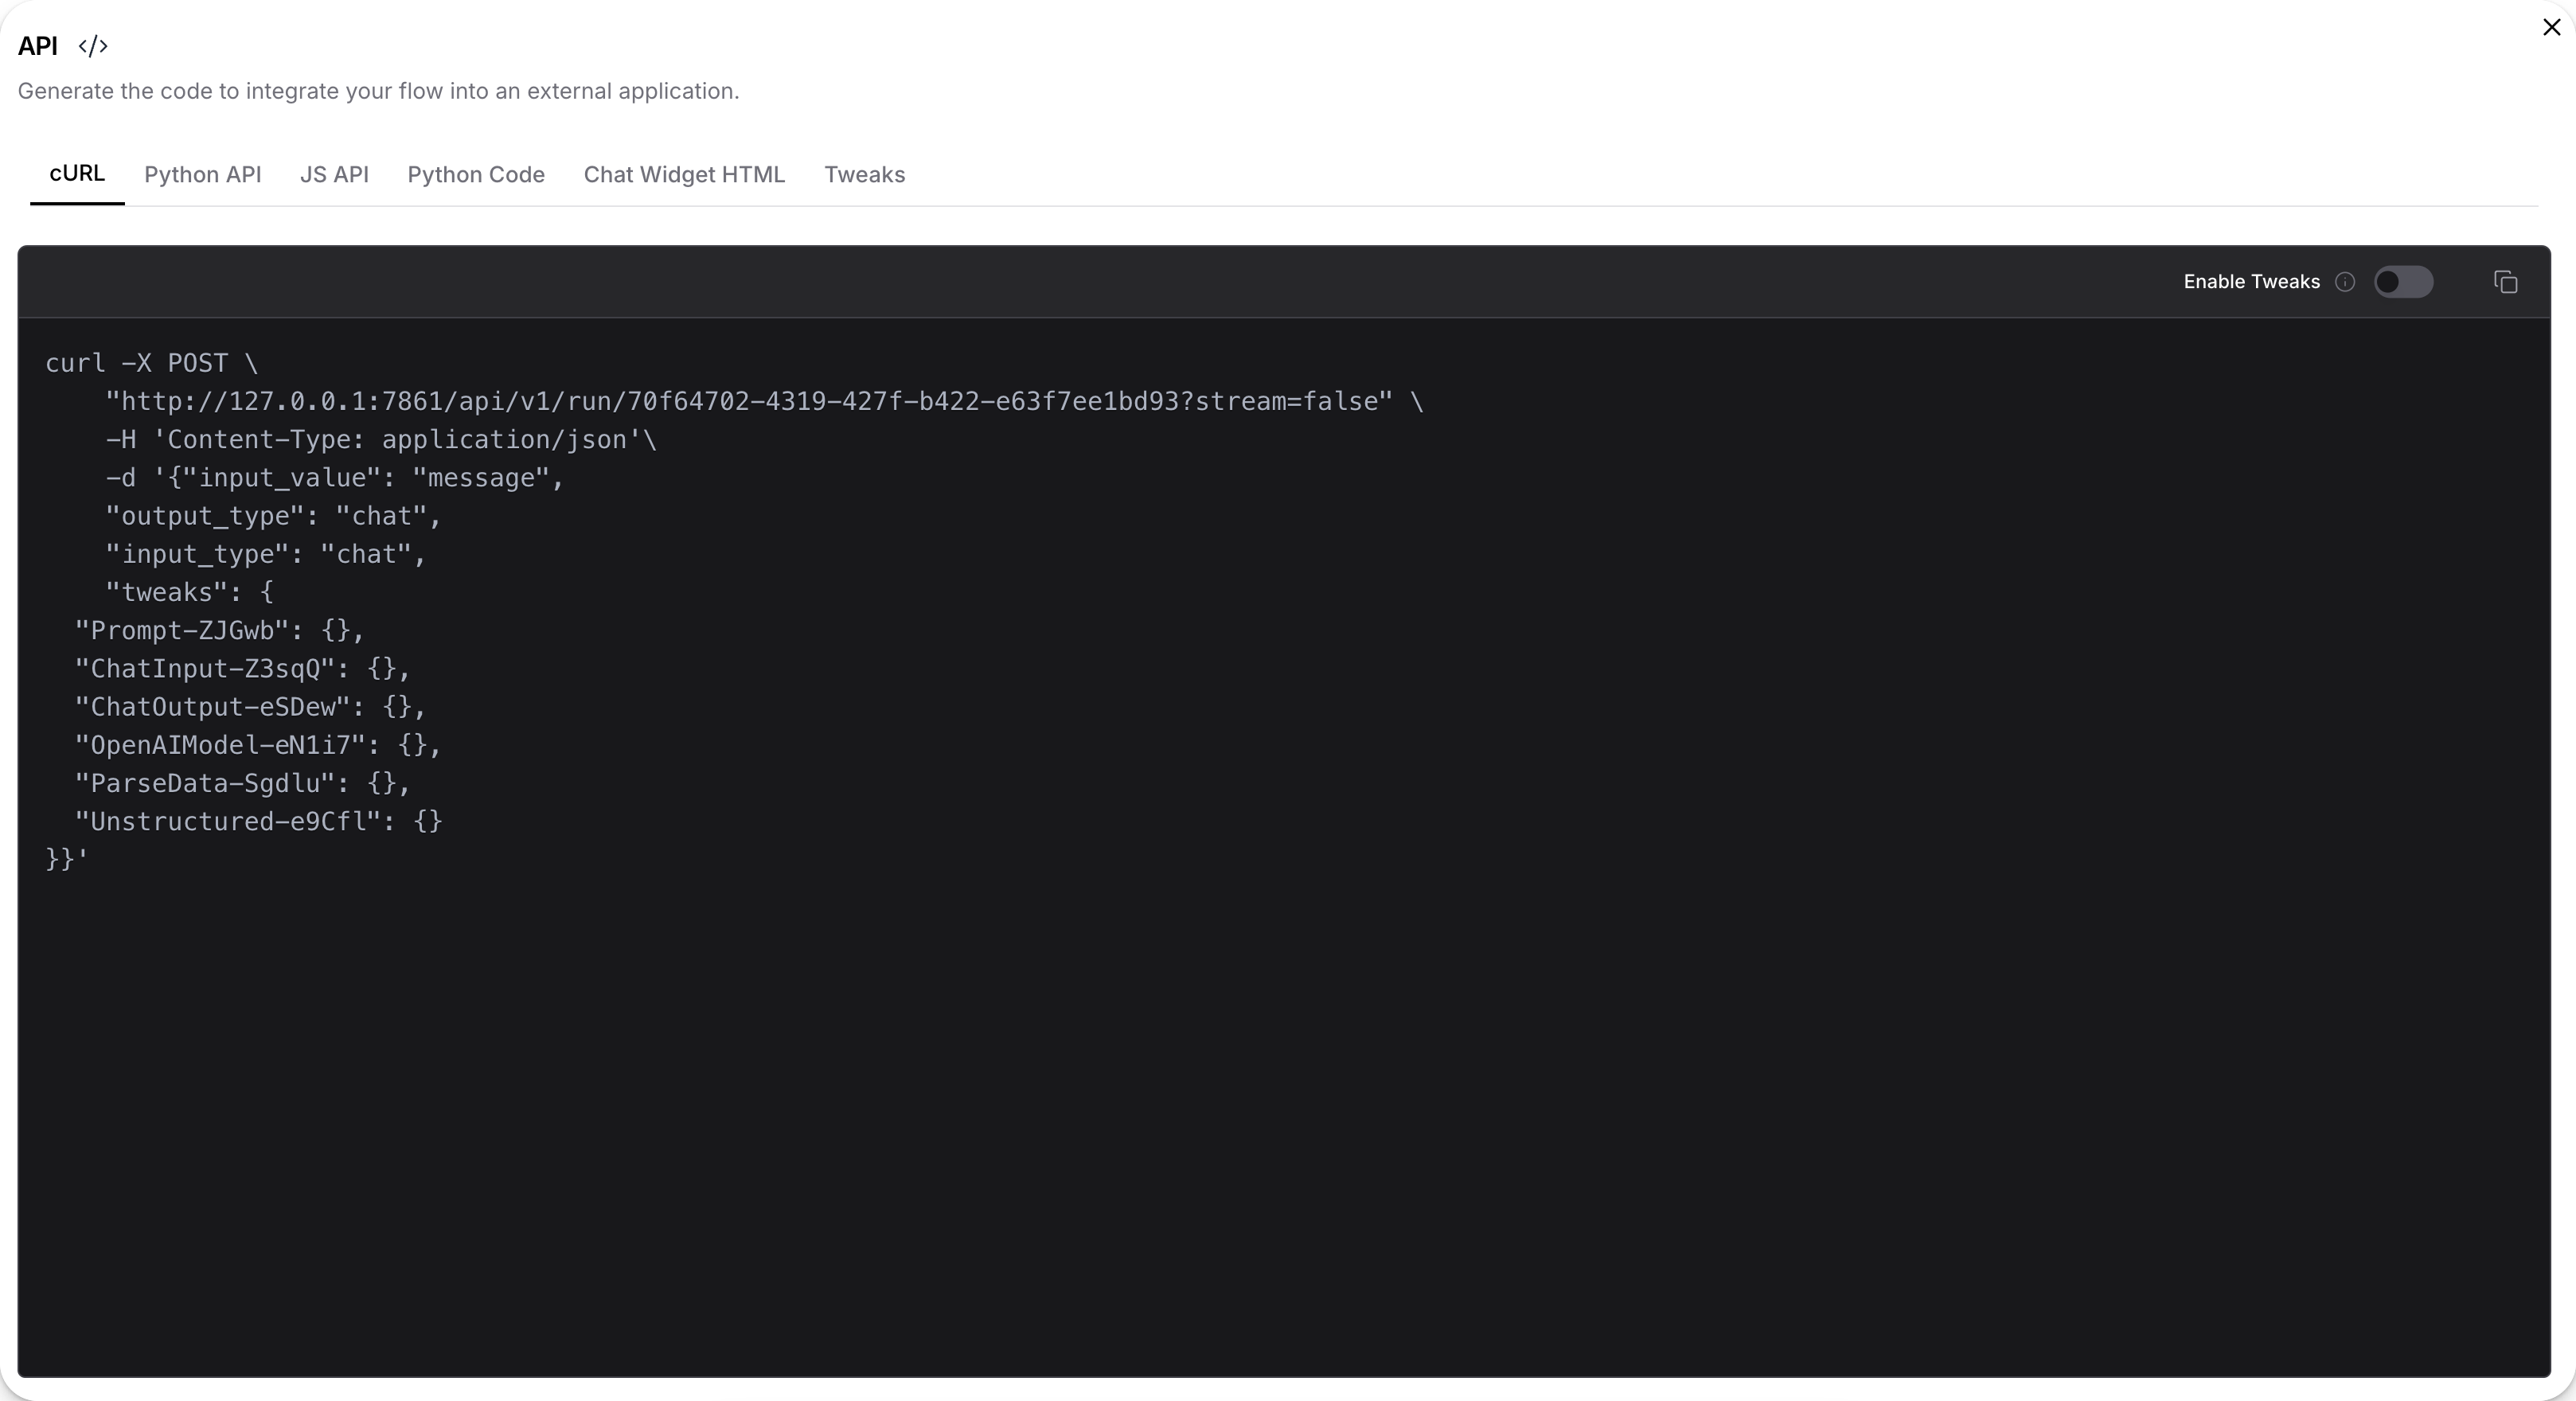
Publish pane
The Publish pane provides code templates to integrate your flows into external applications.
-
Select your language and copy the code snippet to use in your application.
-
The exposed
/api/v1/run/{flow_id}endpoint runs your flow and returns the output. -
The Temporary overrides menu accepts modifications to your flow.
For more information, see Publish.
Put it all together
Let’s do a quick recap.
A flow is an application. Flows are built in the Workspace by connecting components from the Components sidebar.
The Playground is where you test your flow, and the Publish pane provides code snippets to integrate your flow into external applications.
Now that you know your way around, build your own flow with the Quickstart.
Additional workspace features
Explore additional features of the Langflow workspace.
Options menu
The dropdown menu labeled with the project name offers several management and customization options for the current flow in the Langflow workspace.
-
New: Create a new flow from scratch.
-
Settings: Adjust settings specific to the current flow, such as its name, description, and endpoint name. For more information, see Settings.
-
Logs: View logs for the current project, including execution history, errors, and other runtime events.
-
Import: Import a flow or component from a JSON file into the workspace. For more information, see Flows.
-
Export: Export the current flow as a JSON file. For more information, see Flows.
-
Undo: Revert the last action taken in the project.
-
Redo: Reapply a previously undone action.
-
Refresh All: Refresh all components and delete the cache.
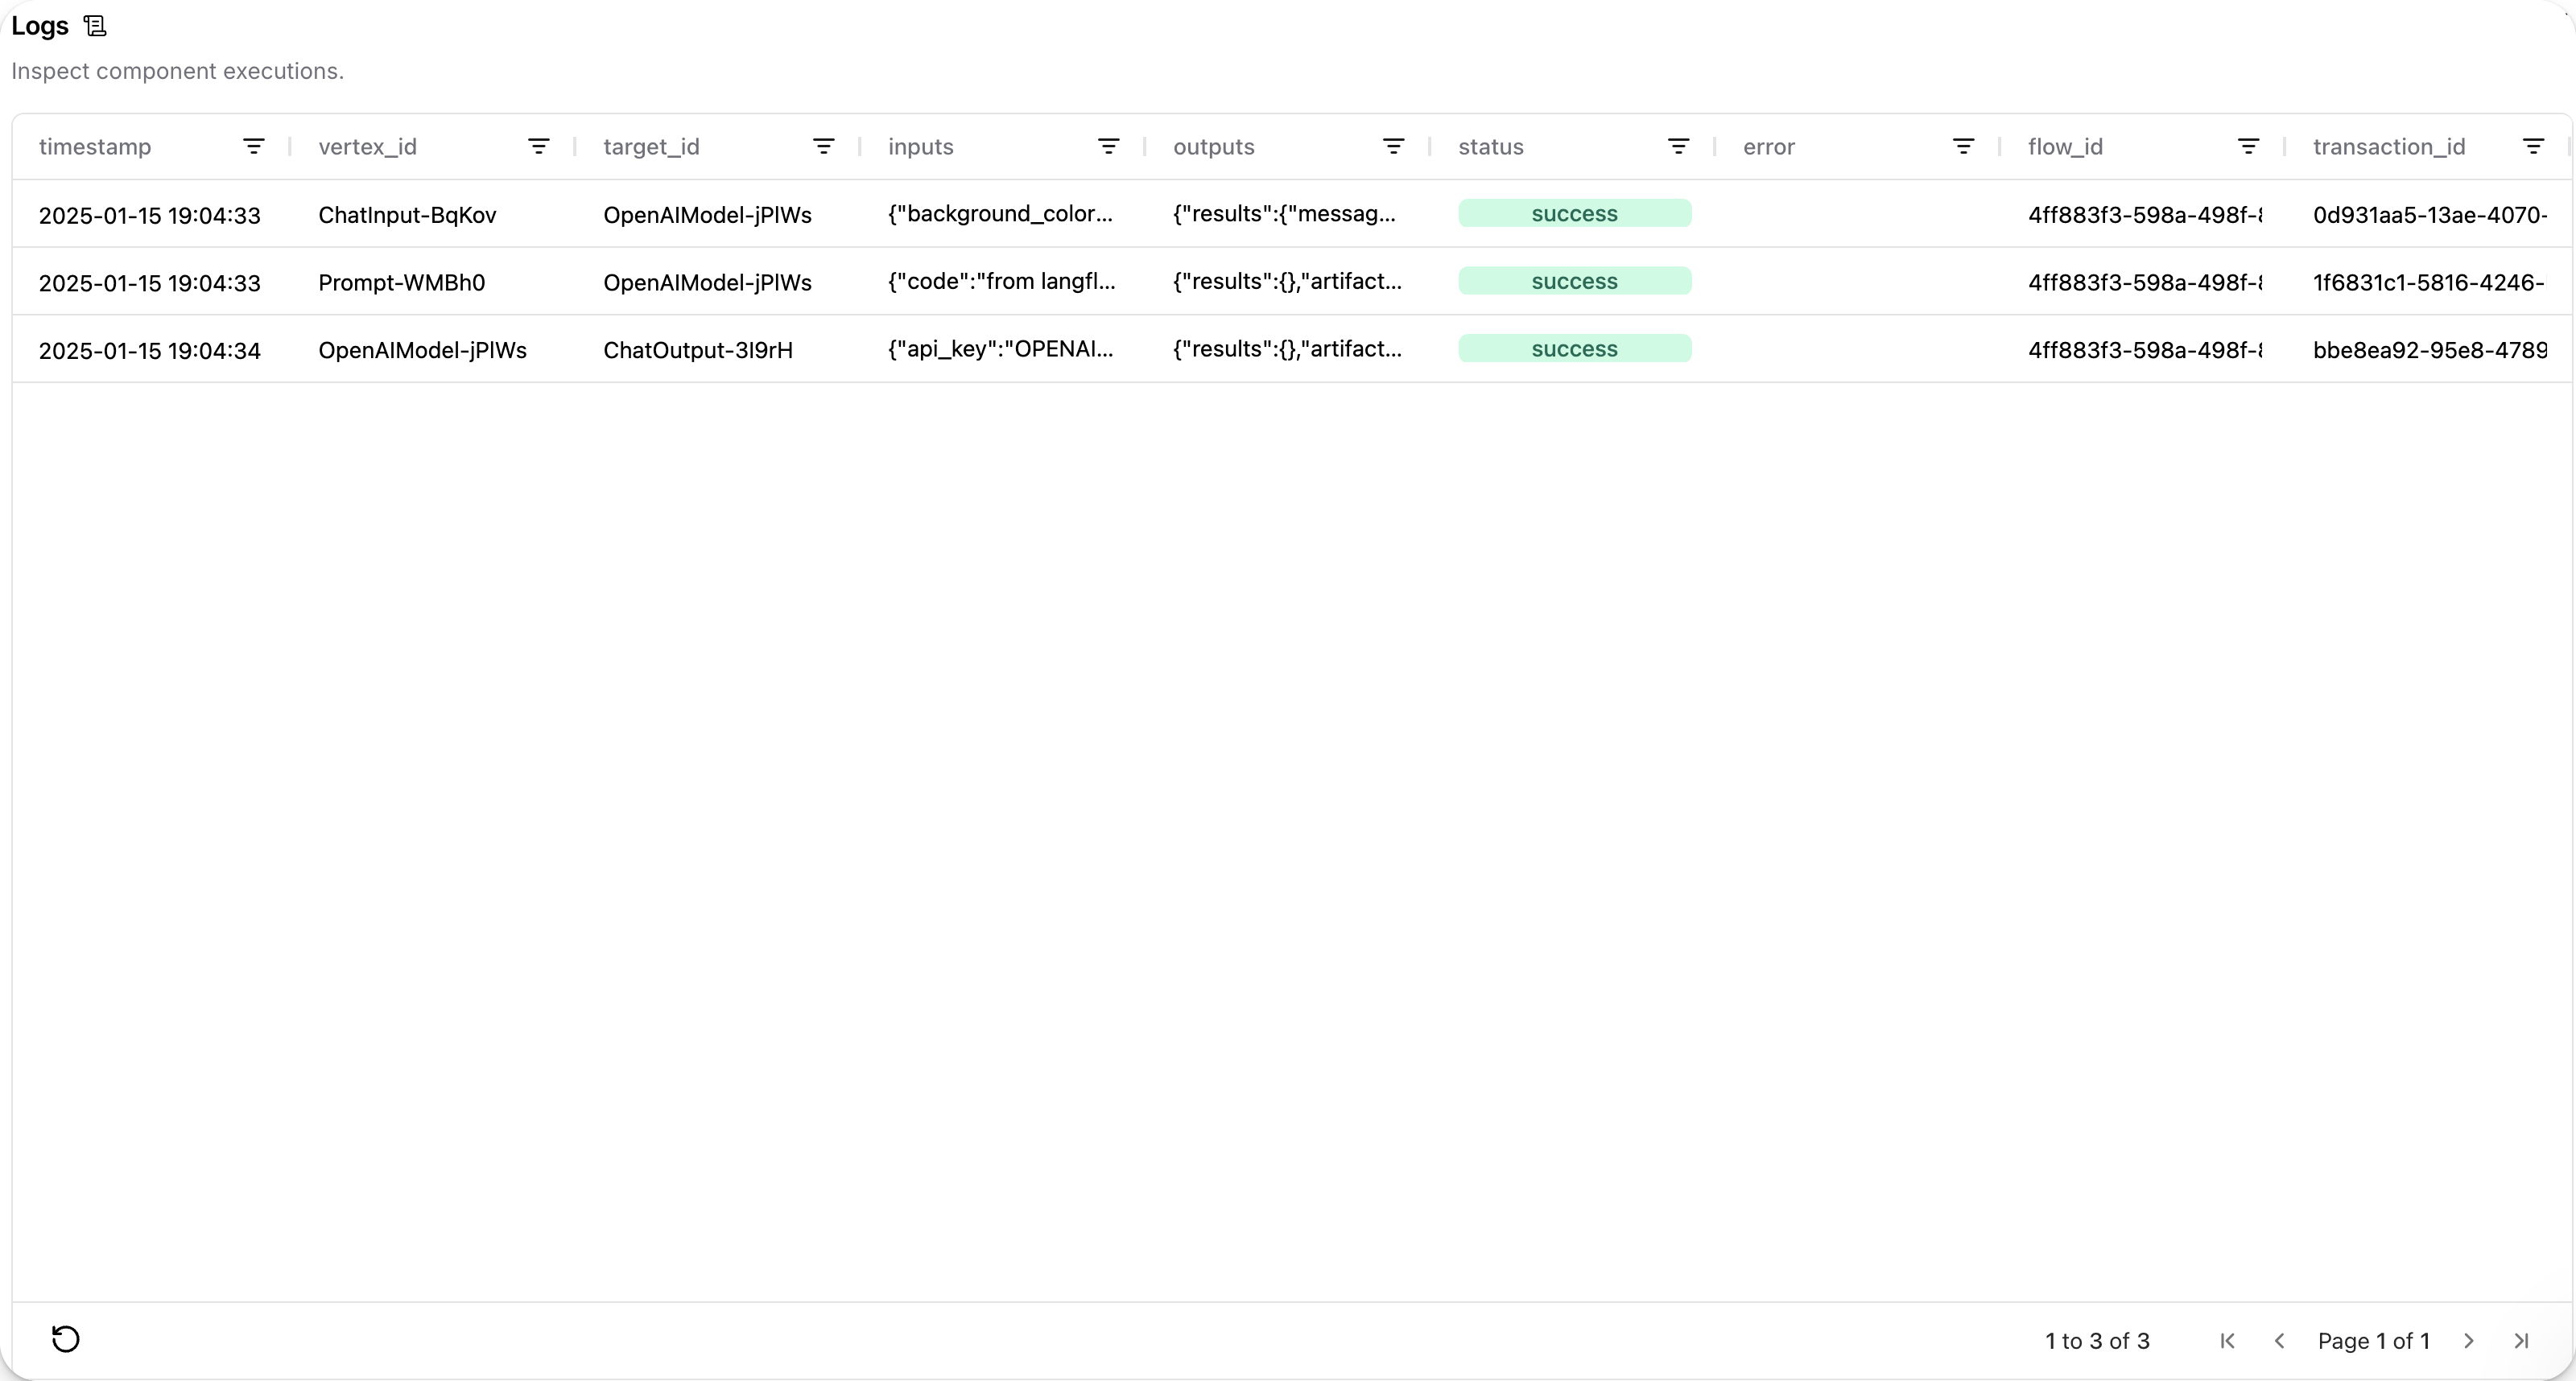
Logs
The Logs pane provides a detailed record of all component executions within a flow.
To access the Logs pane, click your Flow Name, and then select Logs.
Settings
Click Settings to access Global Variables, Shortcuts, and Messages.
Global variables
To add a global variable to your Langflow workspace, do the following:
-
Click Add New.
-
Name your variable, and paste your API key in the Value field.
-
In the Apply To Fields field, select a field to apply this variable to all fields of that type.
Messages logs
Messages displays message logs from all flows in the organization.
