Integrate AWS Glue with Astra DB Serverless
AWS Glue is a serverless data integration service you can use to create jobs that run extract, transform, and load (ETL) scripts.
This guide explains how to connect your Astra DB Serverless database to AWS Glue. After you import your non-vector data from Astra DB into AWS Glue, you can push the data to Redshift, SageMaker, and other AWS services.
Prerequisites
This integration requires the following:
-
A compatible Apache Cassandra® JDBC driver, such as the open-source
ing-bank/cassandra-jdbc-wrapperor the DataStax JDBC driver.A license is required to use the DataStax ODBC and JDBC drivers, which you can download from IBM Fix Central. For more information, visit IBM Support.
-
An AWS account with permissions for Glue, S3, IAM, and the AWS Secrets Manager.
-
An application token with the Organization Administrator role.
-
An Astra DB Serverless database deployed to an AWS region.
Insert data
If your database doesn’t already contain data that you want to import to AWS Glue, you can insert the following sample data:
-
Download the sample CSV file.
-
In the Astra Portal, click the name of the database that you want to connect to.
-
Create a keyspace or use an existing keyspace.
Make a note of the keyspace name. You need it for the connection to AWS Glue.
-
Insert the data:
-
For a Serverless (vector) database, see Load a JSON or CSV file into a collection. You can use a vector-enabled collection, but this integration doesn’t use vector functionality.
-
For a Serverless (non-vector) database, see Load data into a Serverless (non-vector) database.
If you want to follow along with this guide, set
country_nameas the partition key.
-
Create an IAM role
-
In the AWS IAM console navigation pane, select Roles.
-
Click Create Role.
-
For Trusted entity type, select AWS service.
-
For Use case, select Glue.
-
Click Next, and then add the following permissions to the role:
-
AmazonS3FullAccess -
AWSGlueServiceRole -
AWSGlueConsoleFullAccess -
SecretsManagerReadWrite -
AWSGlueJobExecutor
-
-
Click Next, and then enter a role name, such as
AstraGlueRole. -
Click Create Role.
Add the JDBC connection to AWS Glue
A Cassandra-compatible JDBC driver is required to connect AWS Glue and your Astra DB database.
You must upload your JDBC driver JAR file to an S3 bucket, and then create a JDBC connection in AWS Glue.
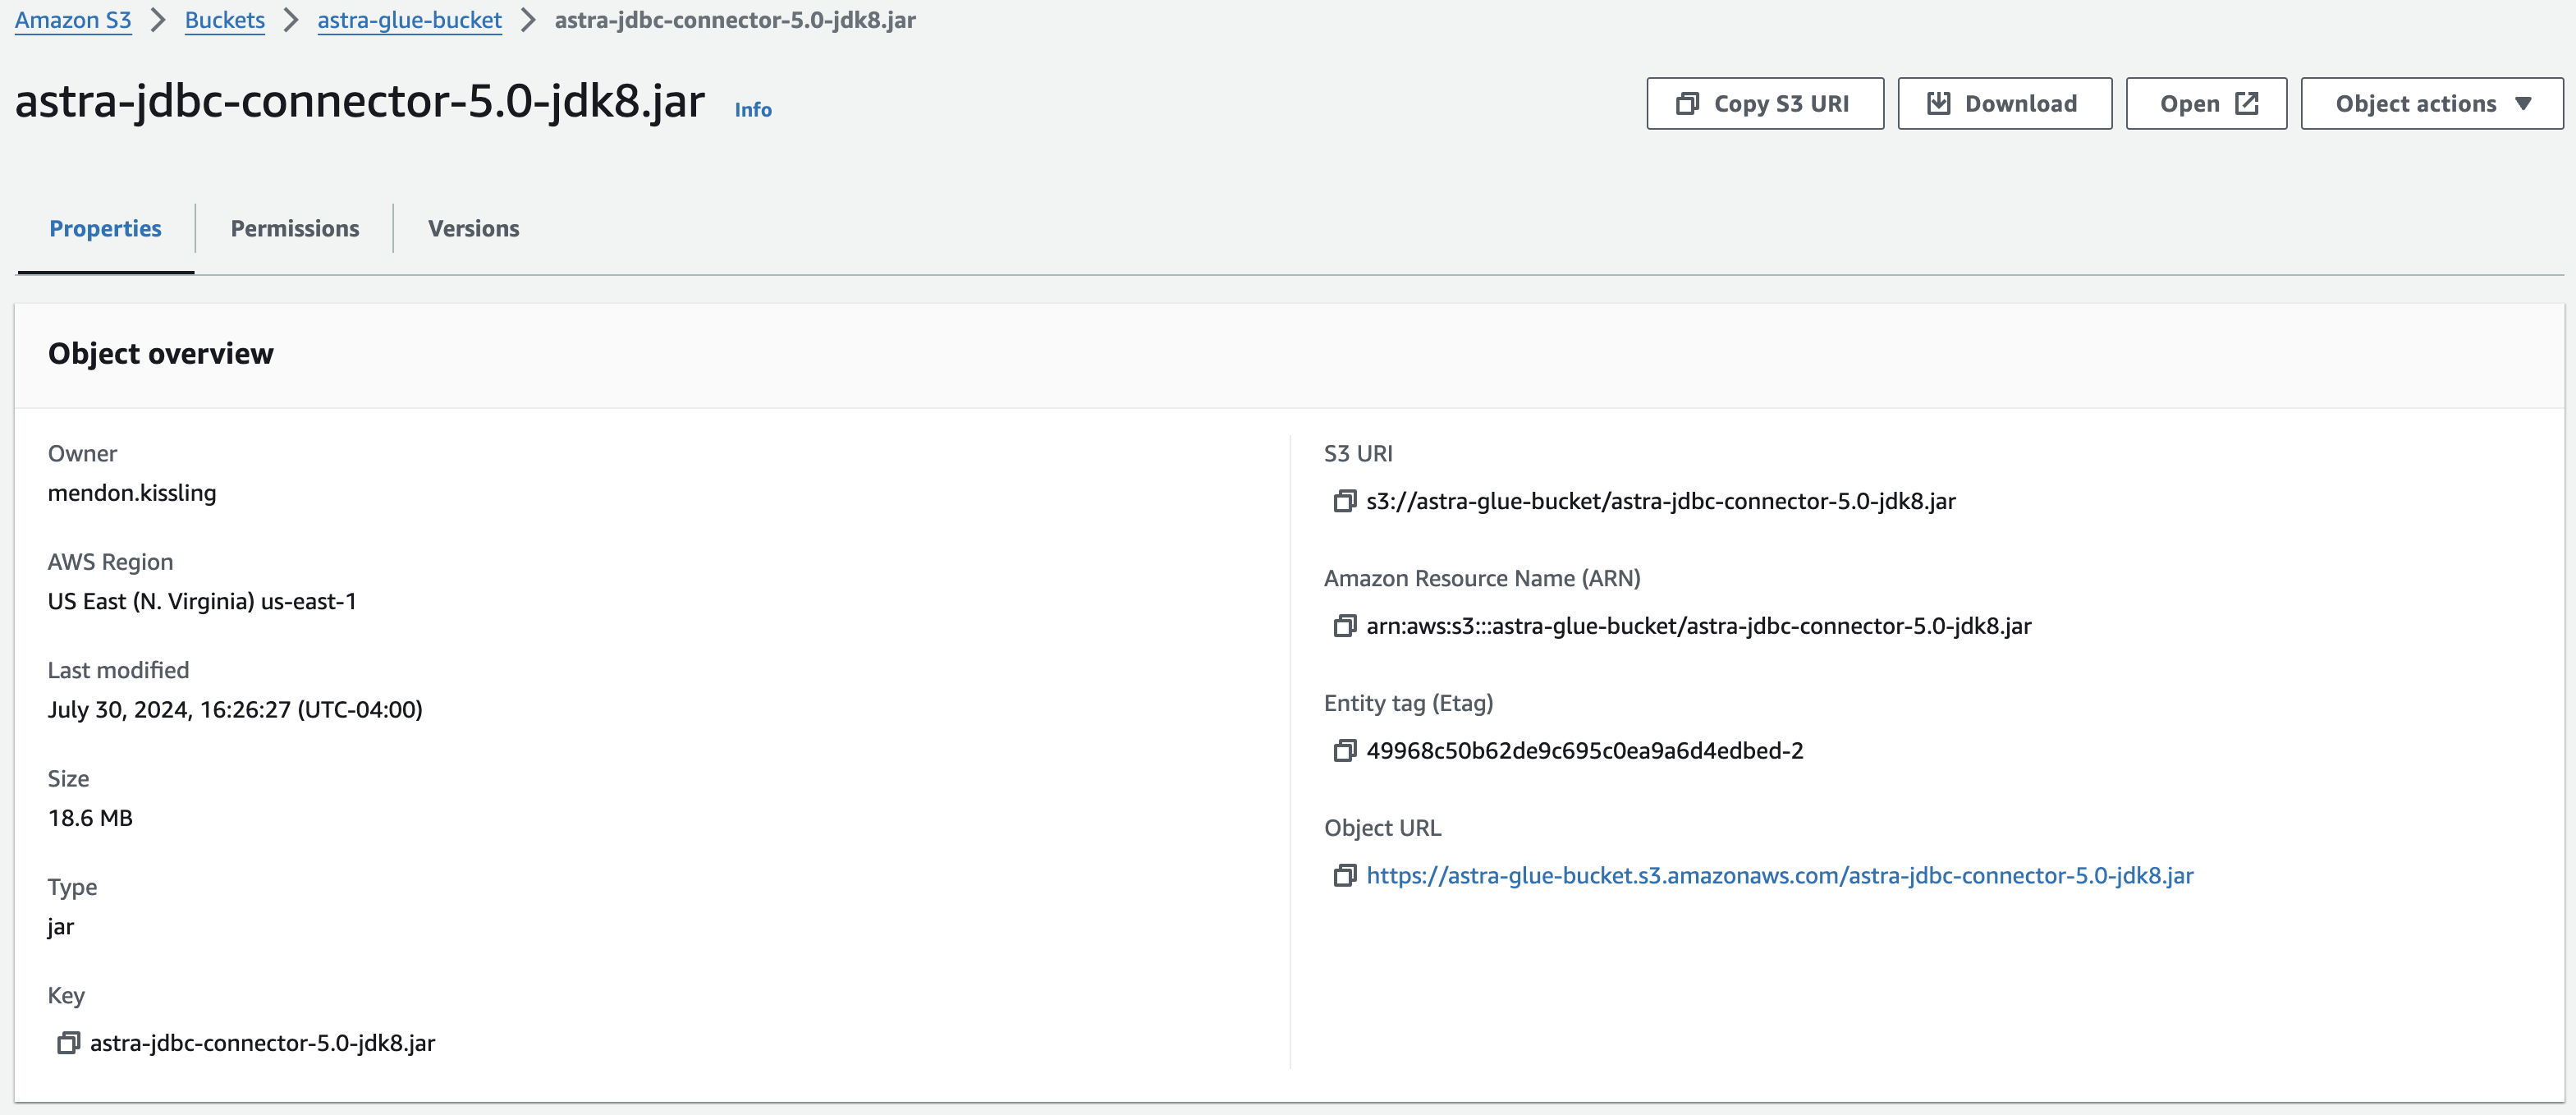
Create the S3 bucket and upload the driver JAR file
-
In the Amazon S3 console, create a bucket in the same region as your Astra DB database.
For permission model, DataStax recommends using Access Control Lists (ACLs). For information about S3 bucket settings, see Creating a bucket.
-
Upload your JDBC driver JAR file to your S3 bucket.
-
On your bucket’s Objects page, click the driver file, and then copy the S3 URI. You will use this when you create the Glue connector.
Create secrets
-
In the Astra Portal, download your database’s Secure Connect Bundle (SCB).
-
Generate an application token that can access your database.
-
Create secrets for your AWS Glue connection, as explained in Storing connection credentials in AWS Secrets Manager.
Set
usernametotoken, and setpasswordto your application token:{ "username": "token", "password": "APPLICATION_TOKEN" }
Create an AWS Glue JDBC connector
-
In the AWS Glue Studio console create a custom JDBC connector, as explained in Adding a JDBC connection using your own JDBC drivers or Creating custom connectors for AWS Glue.
For Connector S3 URL, enter your JDBC driver’s S3 URI.
For the JDBC URL, provide the URL format for your connector.
To connect the OSS Cassandra JDBC driver to Astra DB, provide the JDBC URL for your driver version:
Version 4.16 and laterjdbc:cassandra:astra://DB_NAME/KEYSPACE?token=APPLICATION_TOKEN&consistency=LOCAL_QUORUMVersion 4.15.z and earlierjdbc:cassandra:dbaas:///KEYSPACE?consistency=LOCAL_QUORUM&user=token&password=APPLICATION_TOKEN&secureconnectbundle=/PATH/TO/SCB.zipFor more information, see AWS Glue connection properties.
-
If you did not do so when creating the connector, create a connection for your connector.
For the credentials, use the secret you stored in AWS Secrets Manager.
Create an AWS Glue database and table
-
Create a
schema.txtfile based on your table schema. If you used the sample CSV file, use the following schema:schema.txt[ { "Name": "country_name", "Type": "string", "Comment": "" }, { "Name": "regional_indicator", "Type": "string", "Comment": "" } ] -
In the Amazon S3 Console, create a new, empty bucket for AWS Glue. Make sure the bucket is in the same region as your Glue instance.
-
In the AWS Glue console navigation pane, click Data Catalog/Databases.
-
Click Add database.
-
Enter a database name, and then click Create database.
-
Click Tables, and then click Add table.
-
Enter a table name.
-
Select your new database.
-
Set the Data store to S3, and then select your AWS Glue S3 bucket.
-
Set the Data format to CSV with comma (
,) delimiters. -
Click Next, and then click Choose or define schema.
-
Click Edit schema as JSON.
-
Click Choose file, and then select your
schema.txtfile. -
Click Save, and then click Next.
-
Review the table attributes, and then click Create.
Create an ETL job
Create an ETL job in AWS Glue that ingests data from Astra DB, transforms it to a defined schema, and then pushes it to your AWS Glue database and table.
-
In the AWS Glue Studio console navigation pane, click Data connections.
-
In the Connections section, click your JDBC connection.
-
Click Create job.
-
Enter a job name.
-
On the Visual tab, click the Data source - Connection node for your JDBC connection.
-
For Table name, enter
demographics.If you changed the table name when you loaded data in Astra DB, use that name instead.
-
On the Data preview tab, select your AWS Glue IAM role.
-
To start the data transfer, click Start data preview session, and then wait for the job to run.
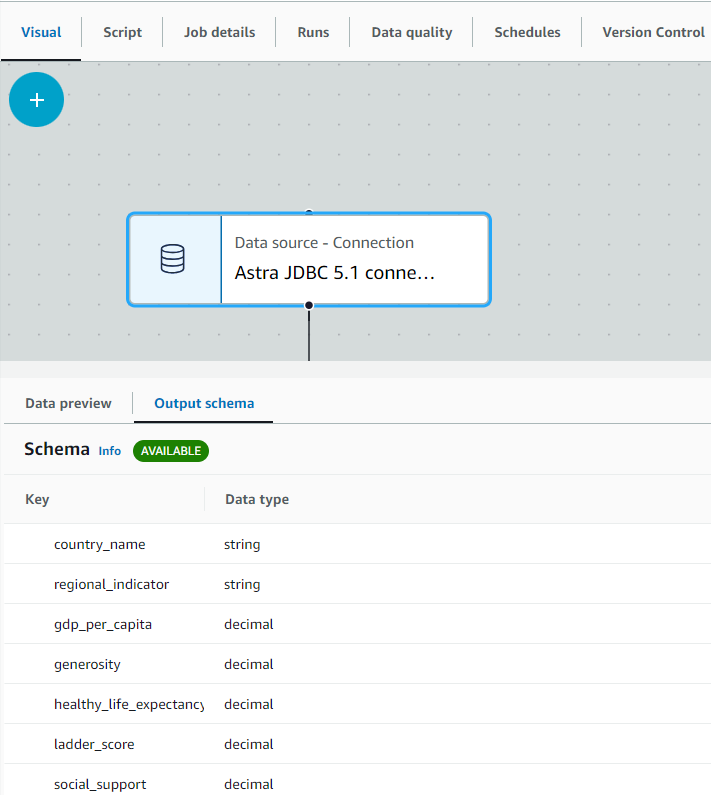
If data extraction succeeded, the preview shows your data from Astra DB.
-
On the Output schema tab, select Use data preview schema. This applies the data schema from Astra DB to your AWS Glue job.
-
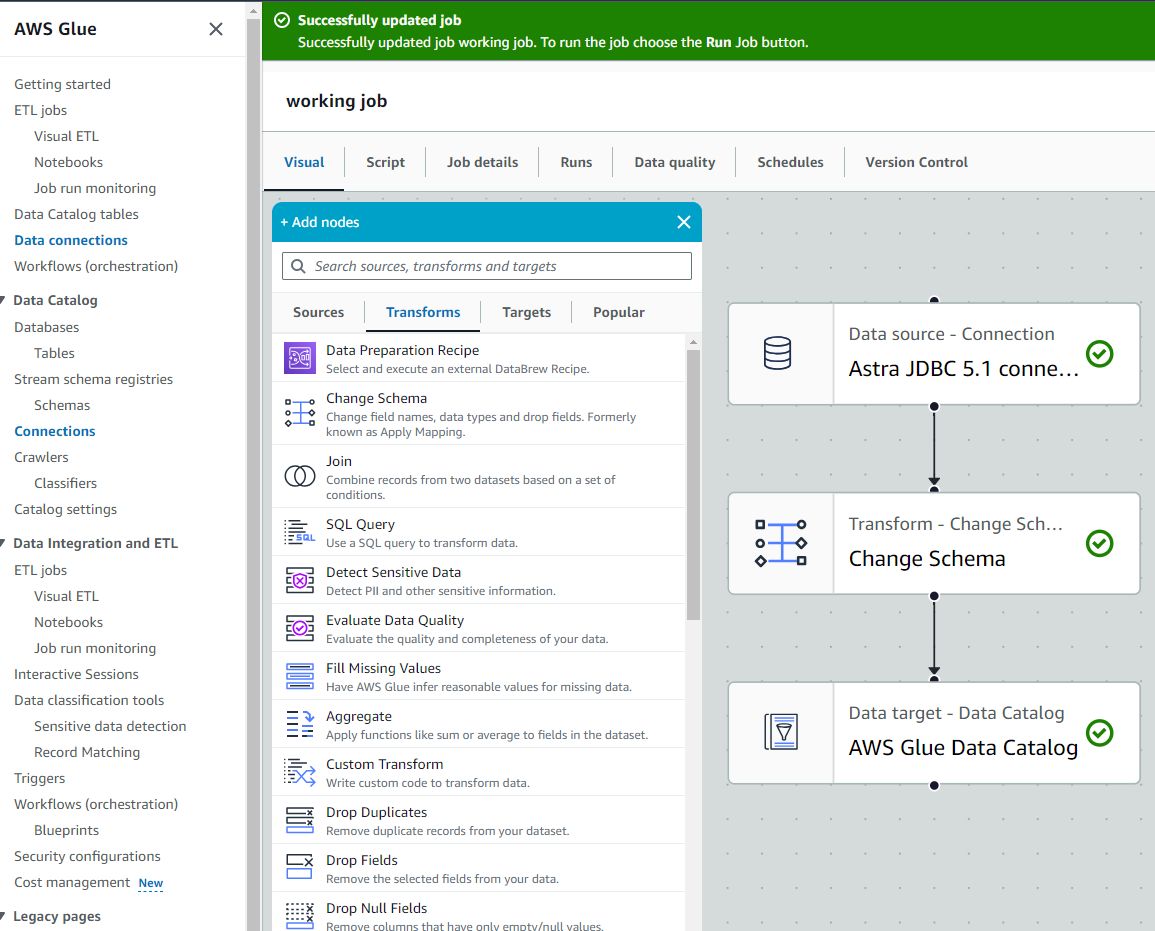
In the Visual tab, click add Add, click the Transform category, and then select Change Schema.
-
Make sure the Transform - Change Schema node is connected to the Data source - Connection node.
If they are not connected, click the Change Schema node, and then set the Parent node to the Connection node.
-
Click the new Transform - Change Schema node, and then inspect the Transform settings:
-
Output schema: The schema received from the Data source - Connection node
-
Data preview: A preview of the data after transformation
-
-
In the Visual tab, click add Add, click the Targets category, and then select Glue Data Catalog.
-
Click the Target - Glue Data Catalog node, and then edit the following settings:
-
Set the Parent node to Change Schema.
-
Select your AWS Glue database and table.
-
-
Click Save.
Test the job
-
In the AWS Glue Studio console navigation pane, click ETL jobs, and then select your ETL job.
-
Click Run.
-
After the job runs, go to the AWS S3 console, and then click your AWS Glue database bucket.
-
Click Download to download a CSV file of the data imported to your AWS Glue database from Astra DB.
