Integrate Superagent with Astra DB Serverless
This Superagent integration with Astra DB Serverless allows you to build, manage, and deploy unique AI Assistants.
This guide explains how to use Astra DB Serverless as a backend vector store for Superagent data.
Prerequisites
For this tutorial, you need the following:
-
An active Serverless (vector) database
-
Python 3.7 or later
-
An OpenAI account and an OpenAI API key
Connect to the database
-
In the Astra Portal, click the name of the database that you want to connect to.
-
Make sure the database is in Active status, and then, in the Database Details section, generate an application token and copy the Data API endpoint for your database. For more information, see Generate a token scoped to a database.
The token format is
AstraCS:followed by a unique token string, and the endpoint format ishttps://DATABASE_ID-REGION.apps.astra.datastax.com. -
Set environment variables for the connection details:
- Linux or macOS
-
export API_ENDPOINT=*API_ENDPOINT* export APPLICATION_TOKEN=*APPLICATION_TOKEN* export OPENAI_API_KEY=*API_KEY* - Windows
-
set API_ENDPOINT=*API_ENDPOINT*set APPLICATION_TOKEN=*APPLICATION_TOKEN*set OPENAI_API_KEY=*API_KEY*
Set up your environment
Create a Python environment and install the dependencies:
conda create --name superagent-demo python=3.10
conda activate superagent-demo
brew install poetry
Set up Superagent
You can deploy Superagent on Replit. It’s an online platform that provides an IDE for coding and collaborating on projects in various programming languages. It’s designed to be an accessible and user-friendly platform for both beginners and experienced developers. Replit offers multiple plans, with more features available to paid plans.
-
Create a
.envfile with the following environment variables:
JWT_SECRET="superagent"
VECTORSTORE="astra"
API_ENDPOINT="API_ENDPOINT" # Your database API endpoint
APPLICATION_TOKEN="APPLICATION_TOKEN" # Your database application token
ASTRA_DB_COLLECTION_NAME="COLLECTION" # A collection in your database where you want to store the data
ASTRA_DB_KEYSPACE_NAME="KEYSPACE" # The keyspace in your database that contains the collection.
OPENAI_API_KEY="API_KEY" # Your OpenAI API key
SUPERAGENT_API_KEY="API_KEY" # Your Superagent API key
MEMORY_API_URL=https://memory.superagent.sh
TZ="Etc/UTC"
Use Astra DB Serverless with Superagent
-
Configure a Large Language Model (LLM) using OpenAI.
llm = client.llm.create(request={ "provider": "OPENAI", "apiKey": "YOUR_OPENAPI_KEY" }) -
Create an agent; also known as an assistant. Because the LLM doesn’t understand when to trigger the data source, the code prompts the user for a question that’s used to query the data source.
agent = client.agent.create(request={ "name": "Chat Assistant", "description": "My first Assistant", "avatar": "https://myavatar.com/homanp.png", "isActive": True, "initialMessage": "Hi there! How can I help you?", "llmModel": "GPT_3_5_TURBO_16K_0613", "prompt": "You are a helpful AI Assistant, use the Tourism trend to answer any questions.", }) -
Attach the LLM to the agent.
client.agent.add_llm(agent_id=agent.data.id, llm_id=llm.data.id) -
Create a data source. This tutorial uses a PDF file for demonstration purposes, but you can specify a different source document.
datasource = client.datasource.create(request={
    "name": "tourism trend",
    "description": "demo pdf doc from internet",
    "type": "PDF",
    "url": "https://cor.europa.eu/en/events/Documents/NAT/Tourism%20-%20new%20trends,%20challenges%20and%20solutions%20-%20background%20note.pdf"
})
This command reads the identified document, processes and encodes the string content, and then inserts the data into the Astra DB Serverless database specified in the
.envfile. -
Add the data source to the agent:
# Connect the data source to the Agent client.agent.add_datasource( agent_id=agent.data.id, datasource_id=datasource.data.id ) -
Invoke the client. The example asks a specific question that is relevant to the PDF file’s tourism content.
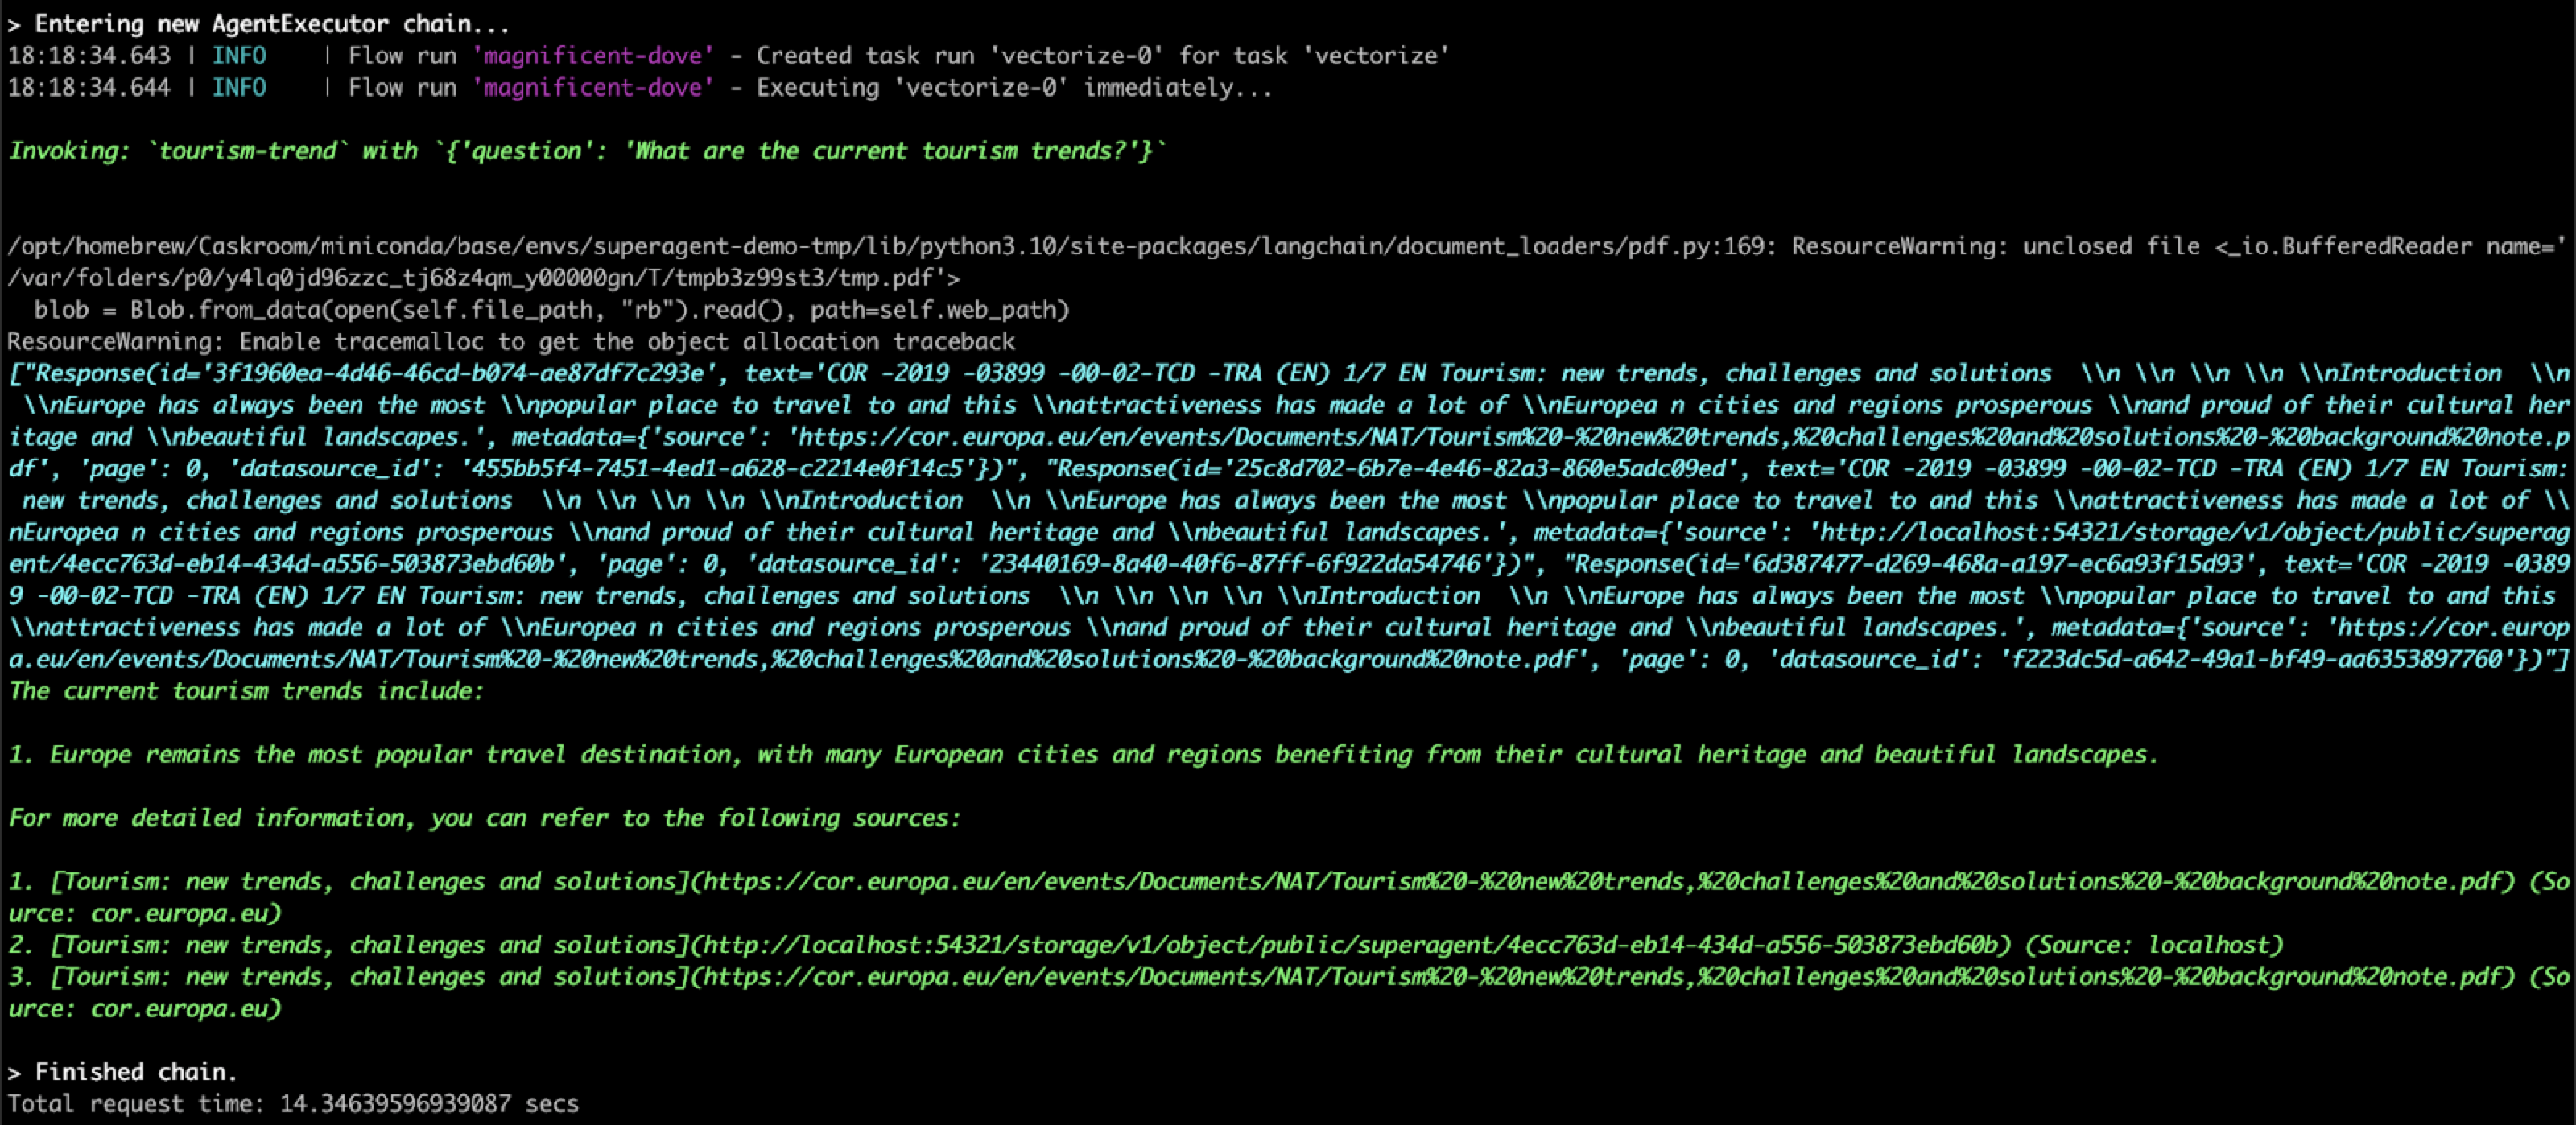
prediction = client.agent.invoke(
    agent_id=agent.data.id,
    input="summarize the tourism trends",
    enable_streaming=False,
    session_id="my_session" # Best practice is to create a unique session per user
)
Here’s sample output: