Creating keyspaces and tables with DataStax Studio
-
DSE 5.1 installed, configured, and running.
-
DataStax Studio installed and running.
-
A connection from Studio to a DSE cluster.
Add CQL code to a notebook to create a simple keyspace and two tables.
-
Open a notebook.
-
Create a DSE keyspace using the CQL command CREATE KEYSPACE:
CREATE KEYSPACE inventory WITH REPLICATION = { 'class' : 'SimpleStrategy', 'replication_factor' : 1 };-
Select CQL select as the language.
-
No keyspace is selected, as none currently exists.
-
Click the button labelled
CL.ONEto execute the CQL code.
 Creating CQL schema 1
 -
-
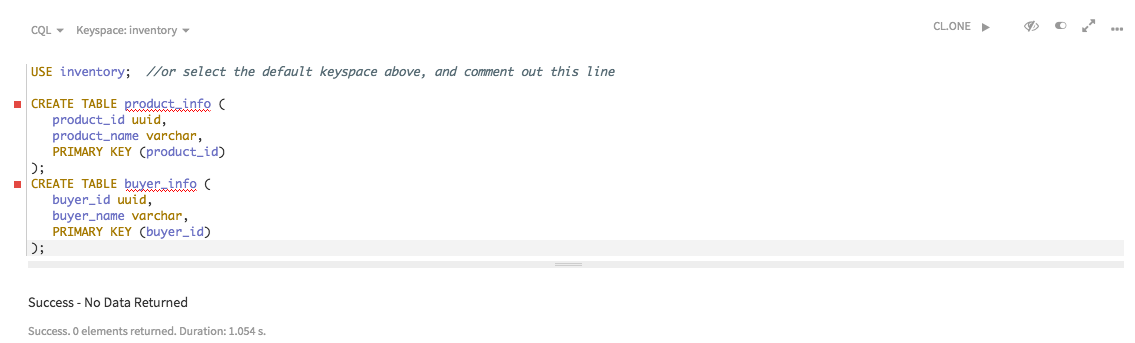
Create two tables using the CQL command:
USE inventory;  //or select the default keyspace above, and comment out this line

CREATE TABLE product_info (
   product_id uuid,
   product_name varchar,
   PRIMARY KEY (product_id)
);
CREATE TABLE buyer_info (
   buyer_id uuid,
   buyer_name varchar,
   PRIMARY KEY (buyer_id)
);
The keyspace can be configured using the Keyspace pull-down menu in the cell, or with the CQL command .
 Creating CQL schema 2
 -
Use the CQL shell command to display information about the keyspace that you created:
DESCRIBE KEYSPACE inventory;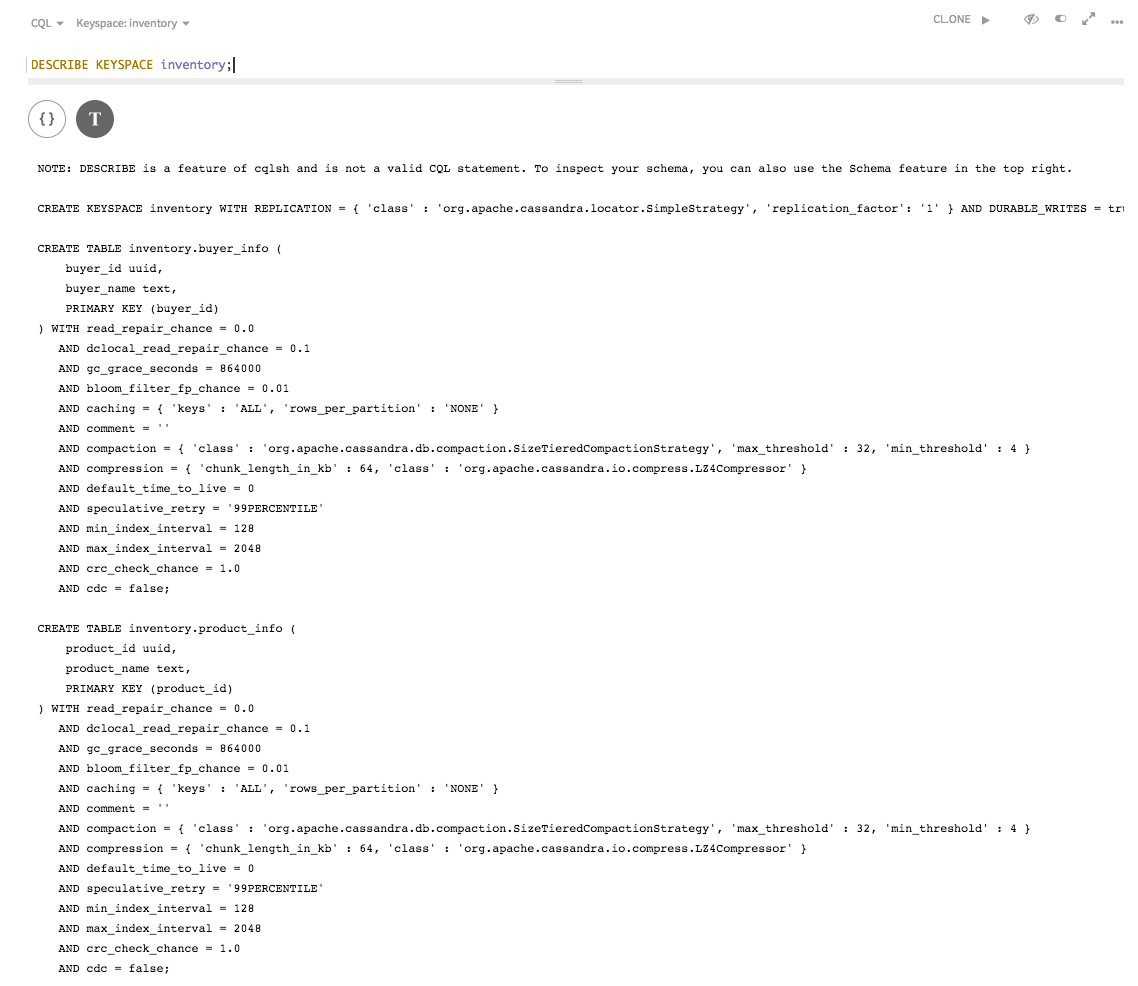 Creating CQL schema 3
